Create workspaces
Only users with the workspace admin role can create a workspace.
Creating a workspace is a two-step process: first define workspace details, then set policies that govern workflow or job execution.
Define workspace details
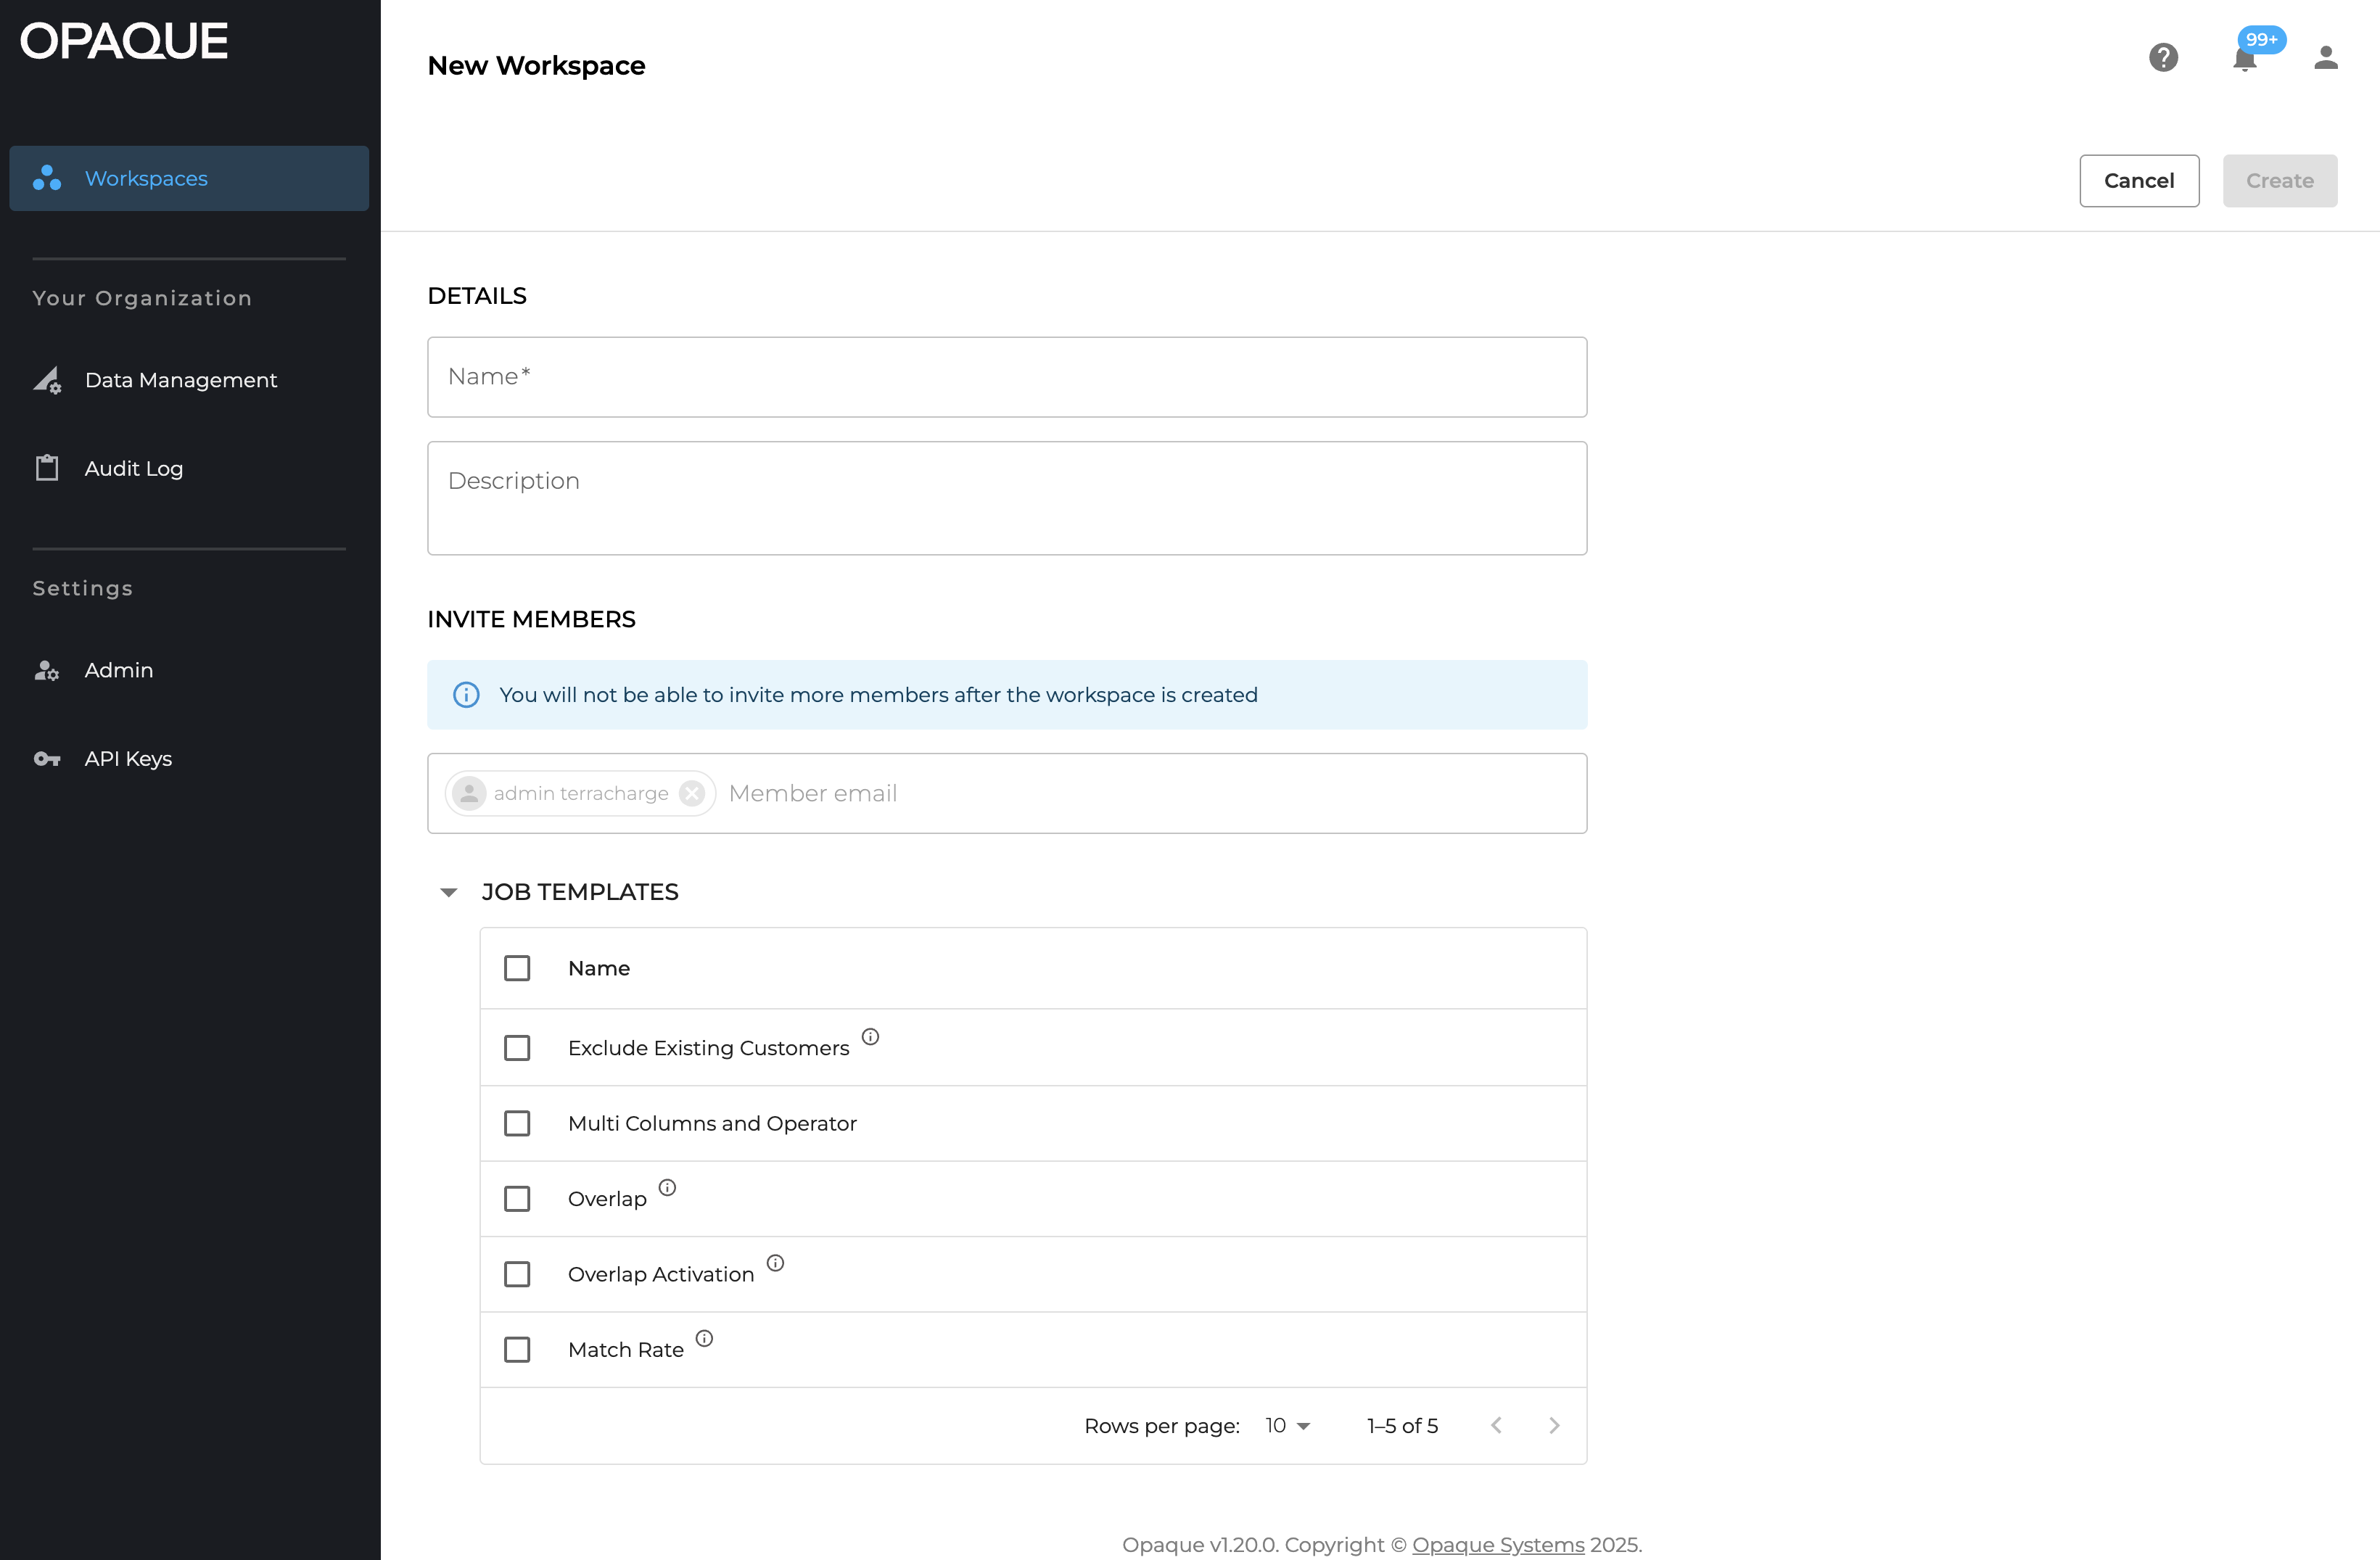
To create a New workspace:
- Go to Workspaces and click New workspace in the upper-right corner.
-
Enter the new workspace details:
- Name: Provide a unique name to help distinguish between projects. (The field supports letters, numbers, spaces, hyphens, and underscores. Duplicate names are allowed but discouraged.)
- Description (optional): Add a short summary (up to 150 characters) to help others understand the workspace’s purpose.
Click New workspace on the Workspaces page to get started.
-
Add members (skip this step for a single-party workspace):
- Use the drop-down menu to select members from your organization or previous collaborators.
- To add external collaborators from a different OPAQUE organization, manually enter their OPAQUE-registered email addresses. (As the workspace admin, you’re added to the space automatically.)
- Choose the type of workspace you want to create. Your options include:
- Agentic AI for building autonomous, policy-governed AI workflows powered by LLMs.
- Analytics and ML for querying datasets, training models, and performing secure data analysis.
- Click Workspace policies to proceed.
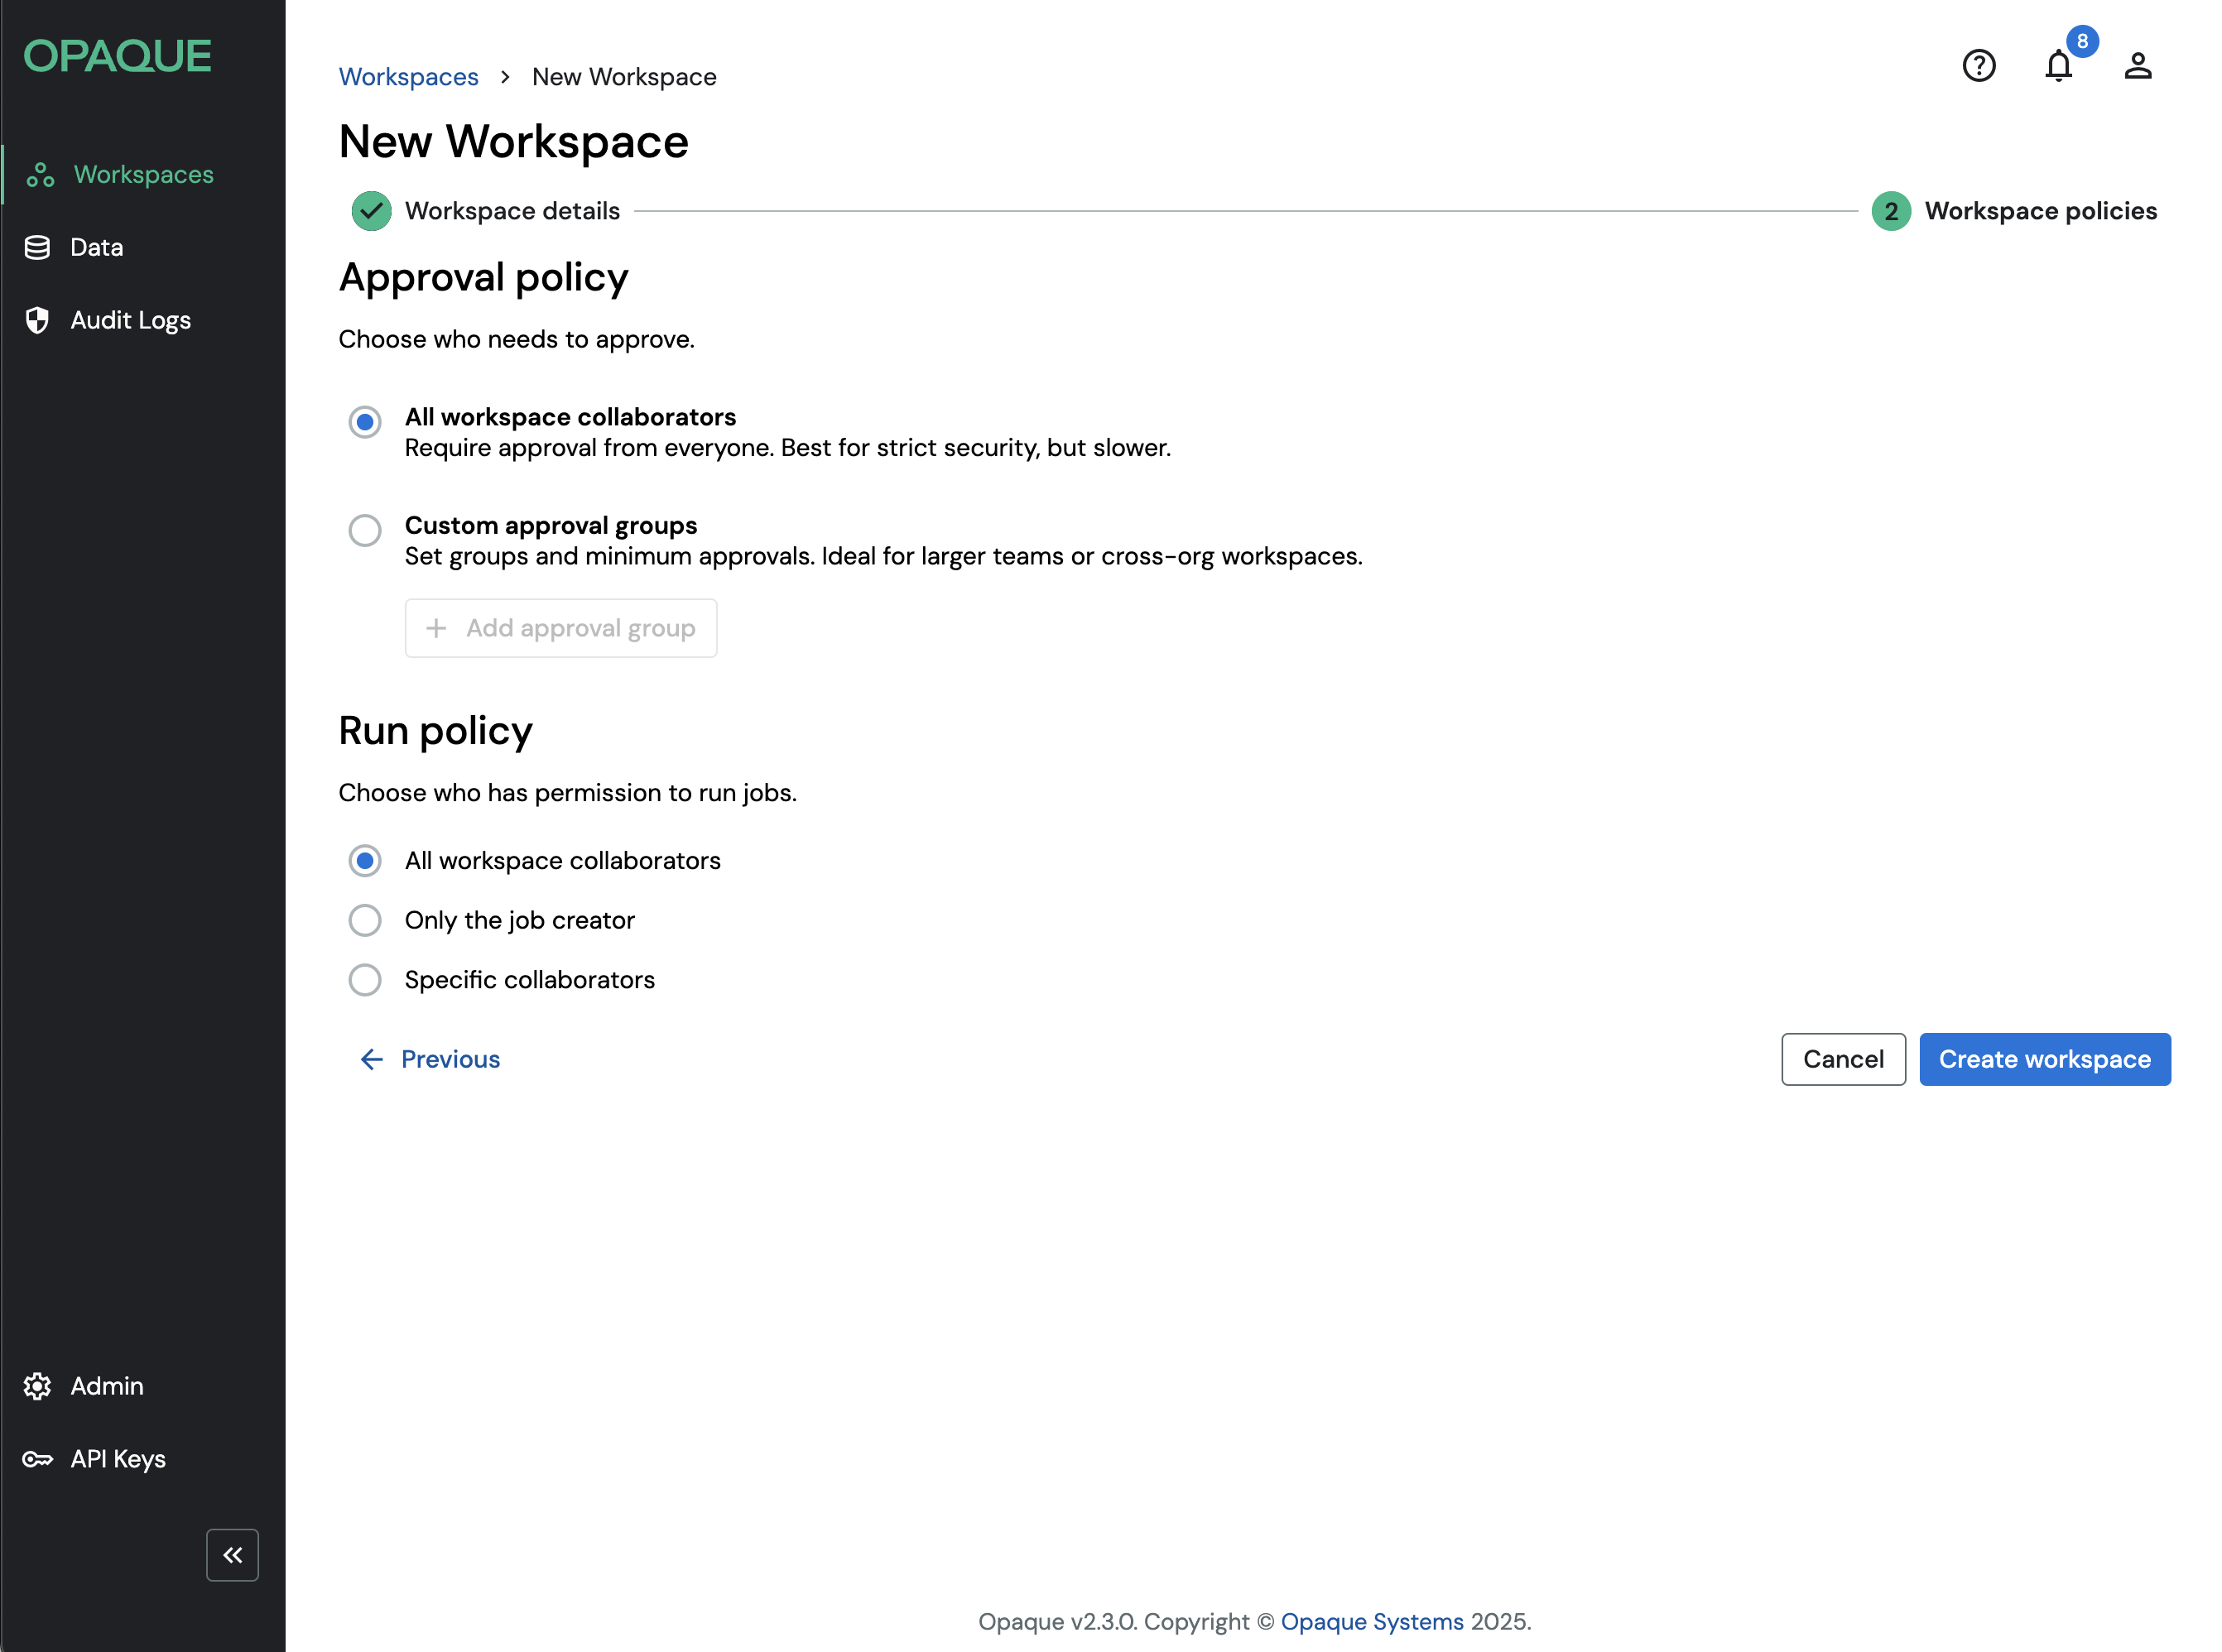
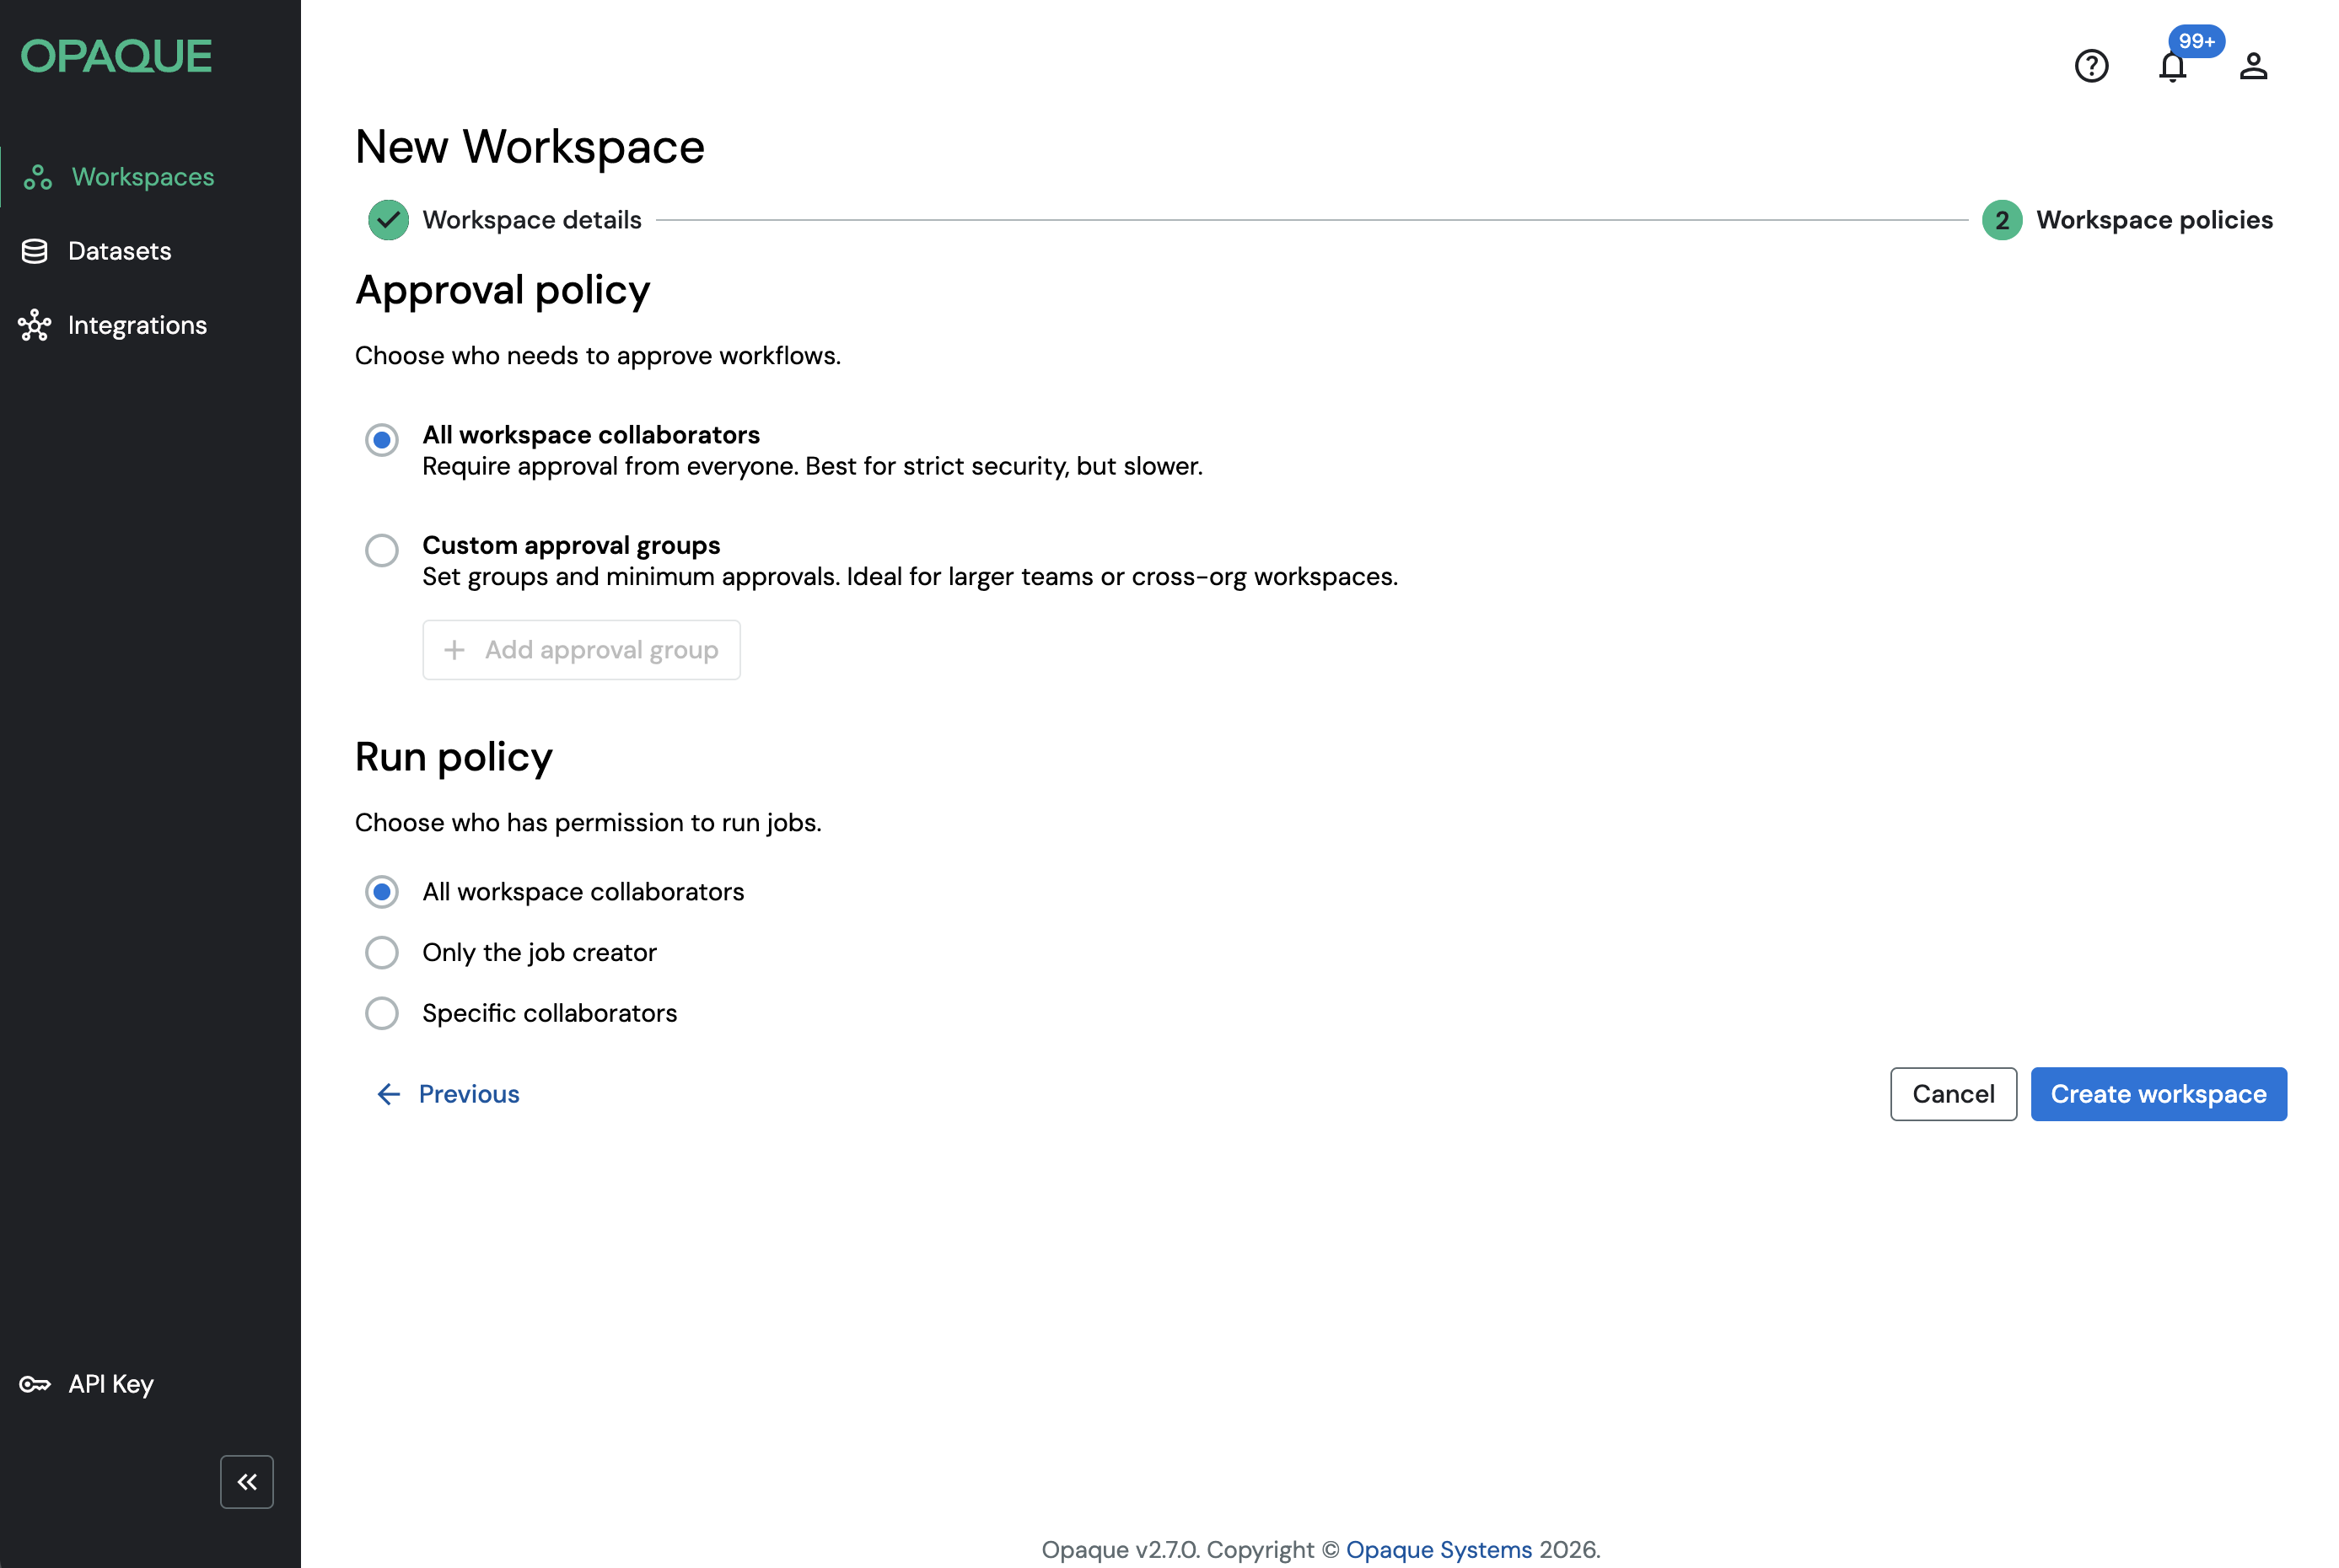
Set workspace policies
You’ll now define who can approve and run jobs in the workspace. These controls are key to enforcing data access policies—especially in multiparty or compliance-sensitive scenarios.
Note
For single-party workspaces, no workflow or job approval is necessary. Click Create workspace to continue.
-
Choose your approval policy, that is, choose who needs to approve your workflow or job:
- All workspace collaborators: Requires every member to approve a workflow or job. Best for strict security, but slower.
- Custom approval groups: Define one or more groups, each with a minimum number of required approvals. Ideal for larger teams or cross-org projects.
Note
The job creator automatically approves the job.
Create an approval group for your workflows.
-
(Analytics and ML workspaces only) Choose your job run policy, that is, choose who has permission to run jobs. Your options include:
- All workspace collaborators
- Only the job creator
- Specific collaborators: When selected, click Choose collaborators to limit who can run jobs and workflows.
Choose your job run policy (Analytics and ML workspaces only).
-
Click Create workspace, then Confirm.
Note
You can add or remove members and update policies at any time from the workspace’s Overview page. Any changes take effect immediately. For details see Manage workspaces.