Get started
This guide walks you through building, reviewing, launching, and triggering an agentic workflow in OPAQUE. By the end, you'll understand how workflows move through their lifecycle and be able to build and invoke one on your own.
Before you begin
You’ll need:
- Access to an Agentic AI workspace in OPAQUE.
- Optional (if you plan to invoke a launched workflow from code): Python 3.10+ and the OPAQUE Python SDK installed locally. See Local setup for details.
- The app subdomain of your OPAQUE deployment. If you’re not sure where to find it, ask your workspace admin.
Workflow lifecycle
Every workflow in OPAQUE moves through three stages before it can be called by an application:
Draft → Review → Launch
In draft, you build and test your workflow freely. You can add, connect, and configure nodes, and iterate as much as you need before submitting.
In review, workspace members verify that the workflow's configuration meets your organization's policies and governance requirements. If changes are required, reviewers can reject the workflow; you then return it to draft, revise it, and resubmit. In single-party workspaces, approval is automatic.
Once approved, you launch the workflow to activate it as a persistent, callable service. At this point, the workflow's definition is locked—you can stop or restart it, but to make changes you must return it to draft and go through review again.
Step 1: Build your workflow
Start by navigating to the workspace where your workflow will live.
-
Go to Workspaces, open an Agentic AI workspace from the list, and select the Workflows tab. This tab lists all workflows created in the selected workspace. If none exist, the page will be blank.
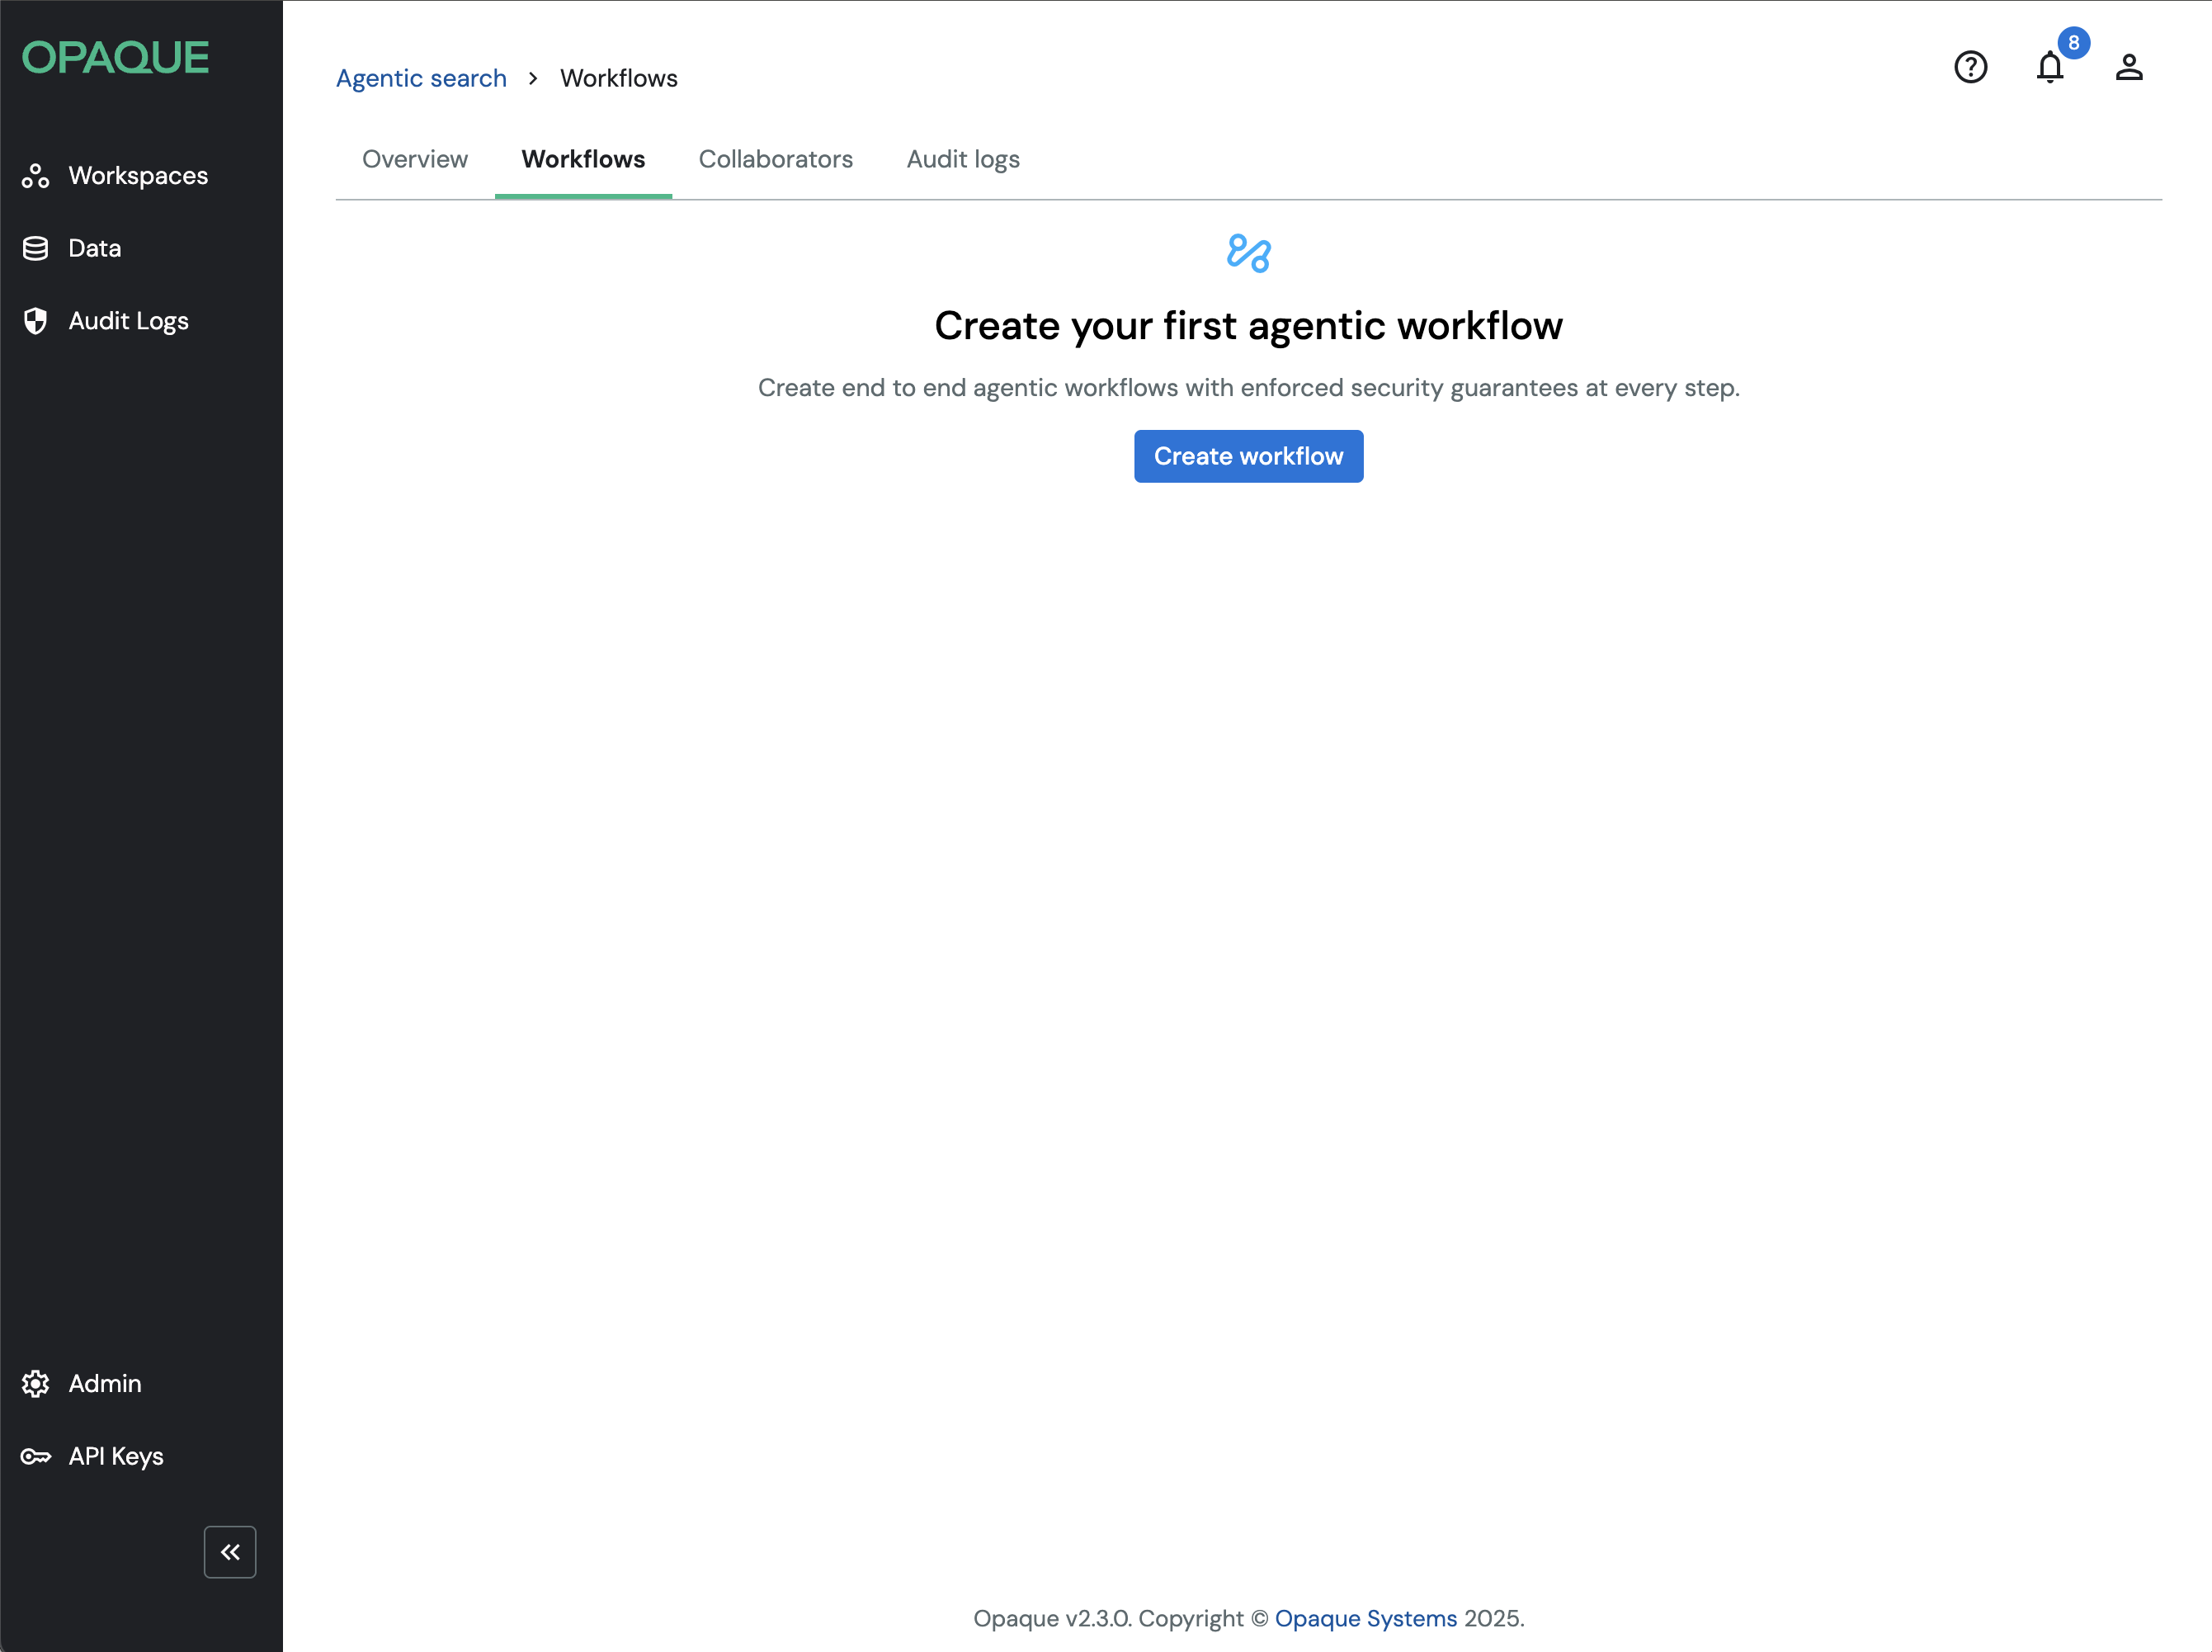
Go to Workspaces > Workflows to create agentic workflows.
-
Click Create workflow.
- Enter a name (max. 50 characters) and optional description (max. 150 characters), then click Save.
The workflow builder opens with a blank canvas containing two nodes: Start and End. The Start node is where input enters the workflow (typically via API call), and the End node returns the response to the caller.
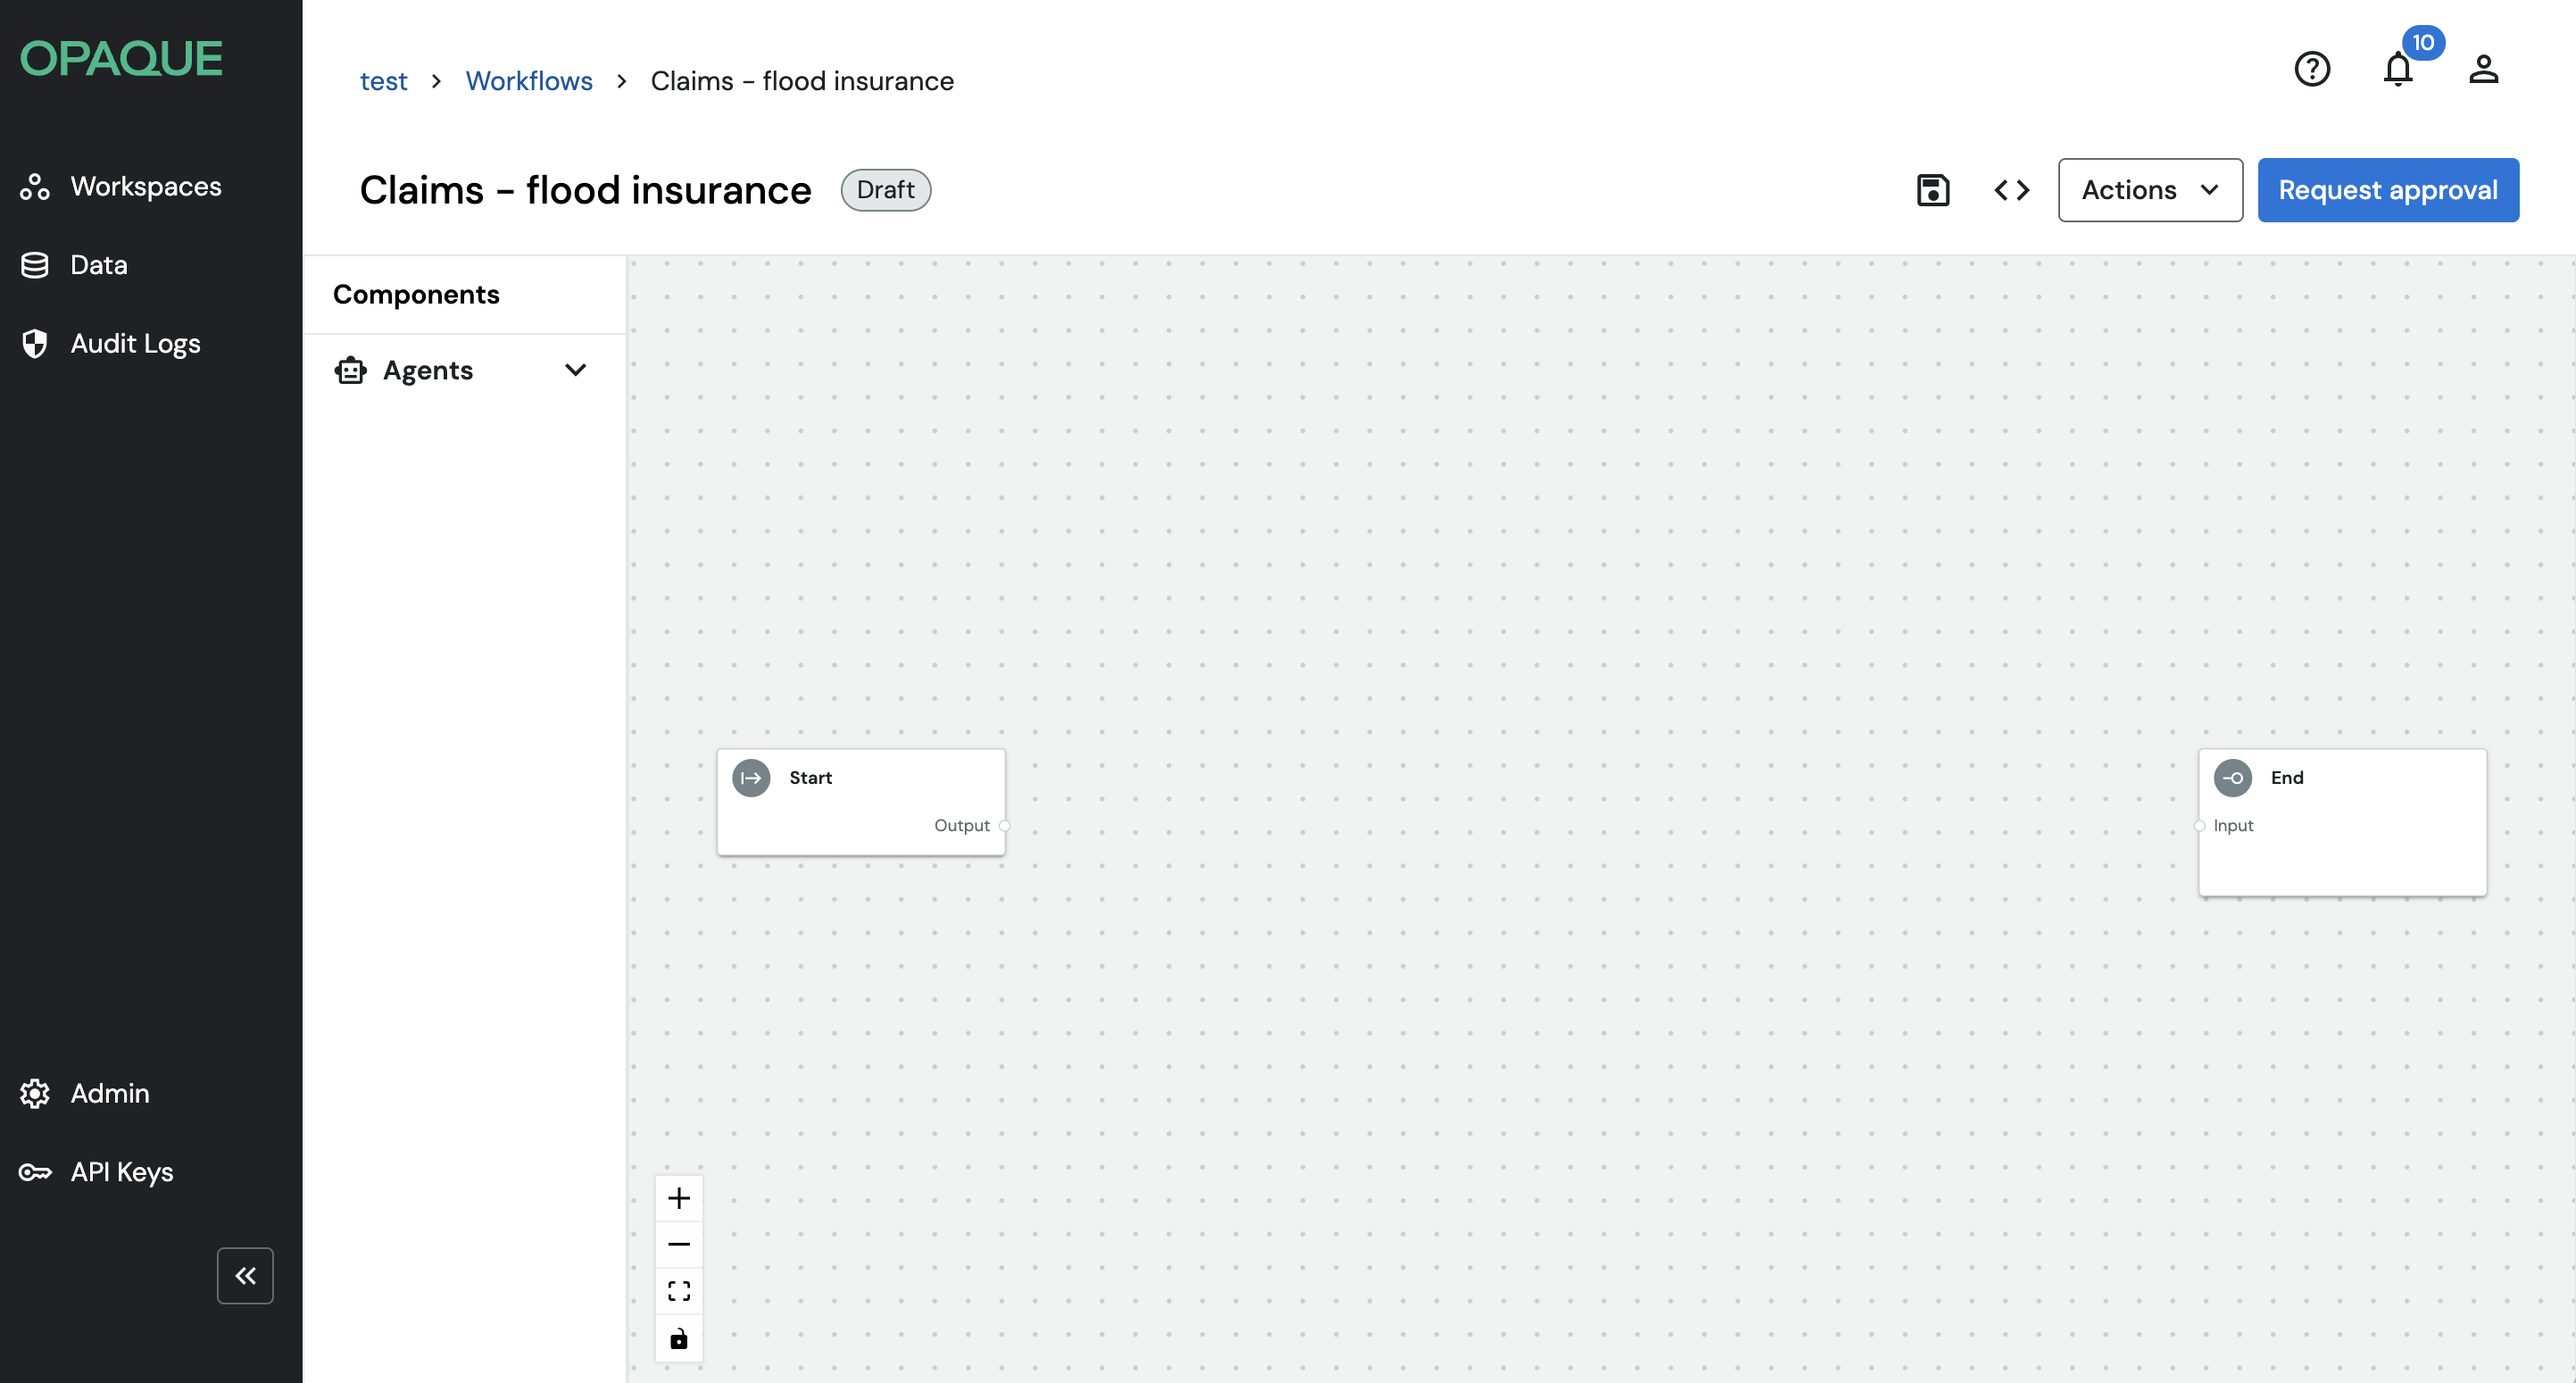
A new workflow canvas with start and end nodes.
Add nodes
On the left, you’ll see the Nodes panel. This is where you select the capabilities your workflow can use. Each node represents a single execution step, such as calling a model, retrieving data, or applying a utility. Nodes are organized into four categories:
- LLMs—call hosted models (Anthropic, Azure OpenAI, OpenAI, or self-hosted via vLLM).
- Data connectors—retrieve and query data from sources like Azure AI Search, PostgreSQL, or Neo4j.
- Agents—execute goal-directed reasoning steps that can coordinate model calls and tools dynamically.
- Utilities—apply tools and data handling, including MCP integrations and OPAQUE's built-in Redact/Unredact nodes for sensitive data.
Note
For full descriptions of each node type and its configuration options, see Working with nodes.
To add a node, drag it from the panel onto the canvas, or click it to place it.
For example, for a simple retrieval-augmented flow, expand the Data connectors and LLMs categories, then add a Data connector node (for example, Azure AI Search Retriever) followed by an LLM node (for example, Anthropic Service or OpenAI Service).
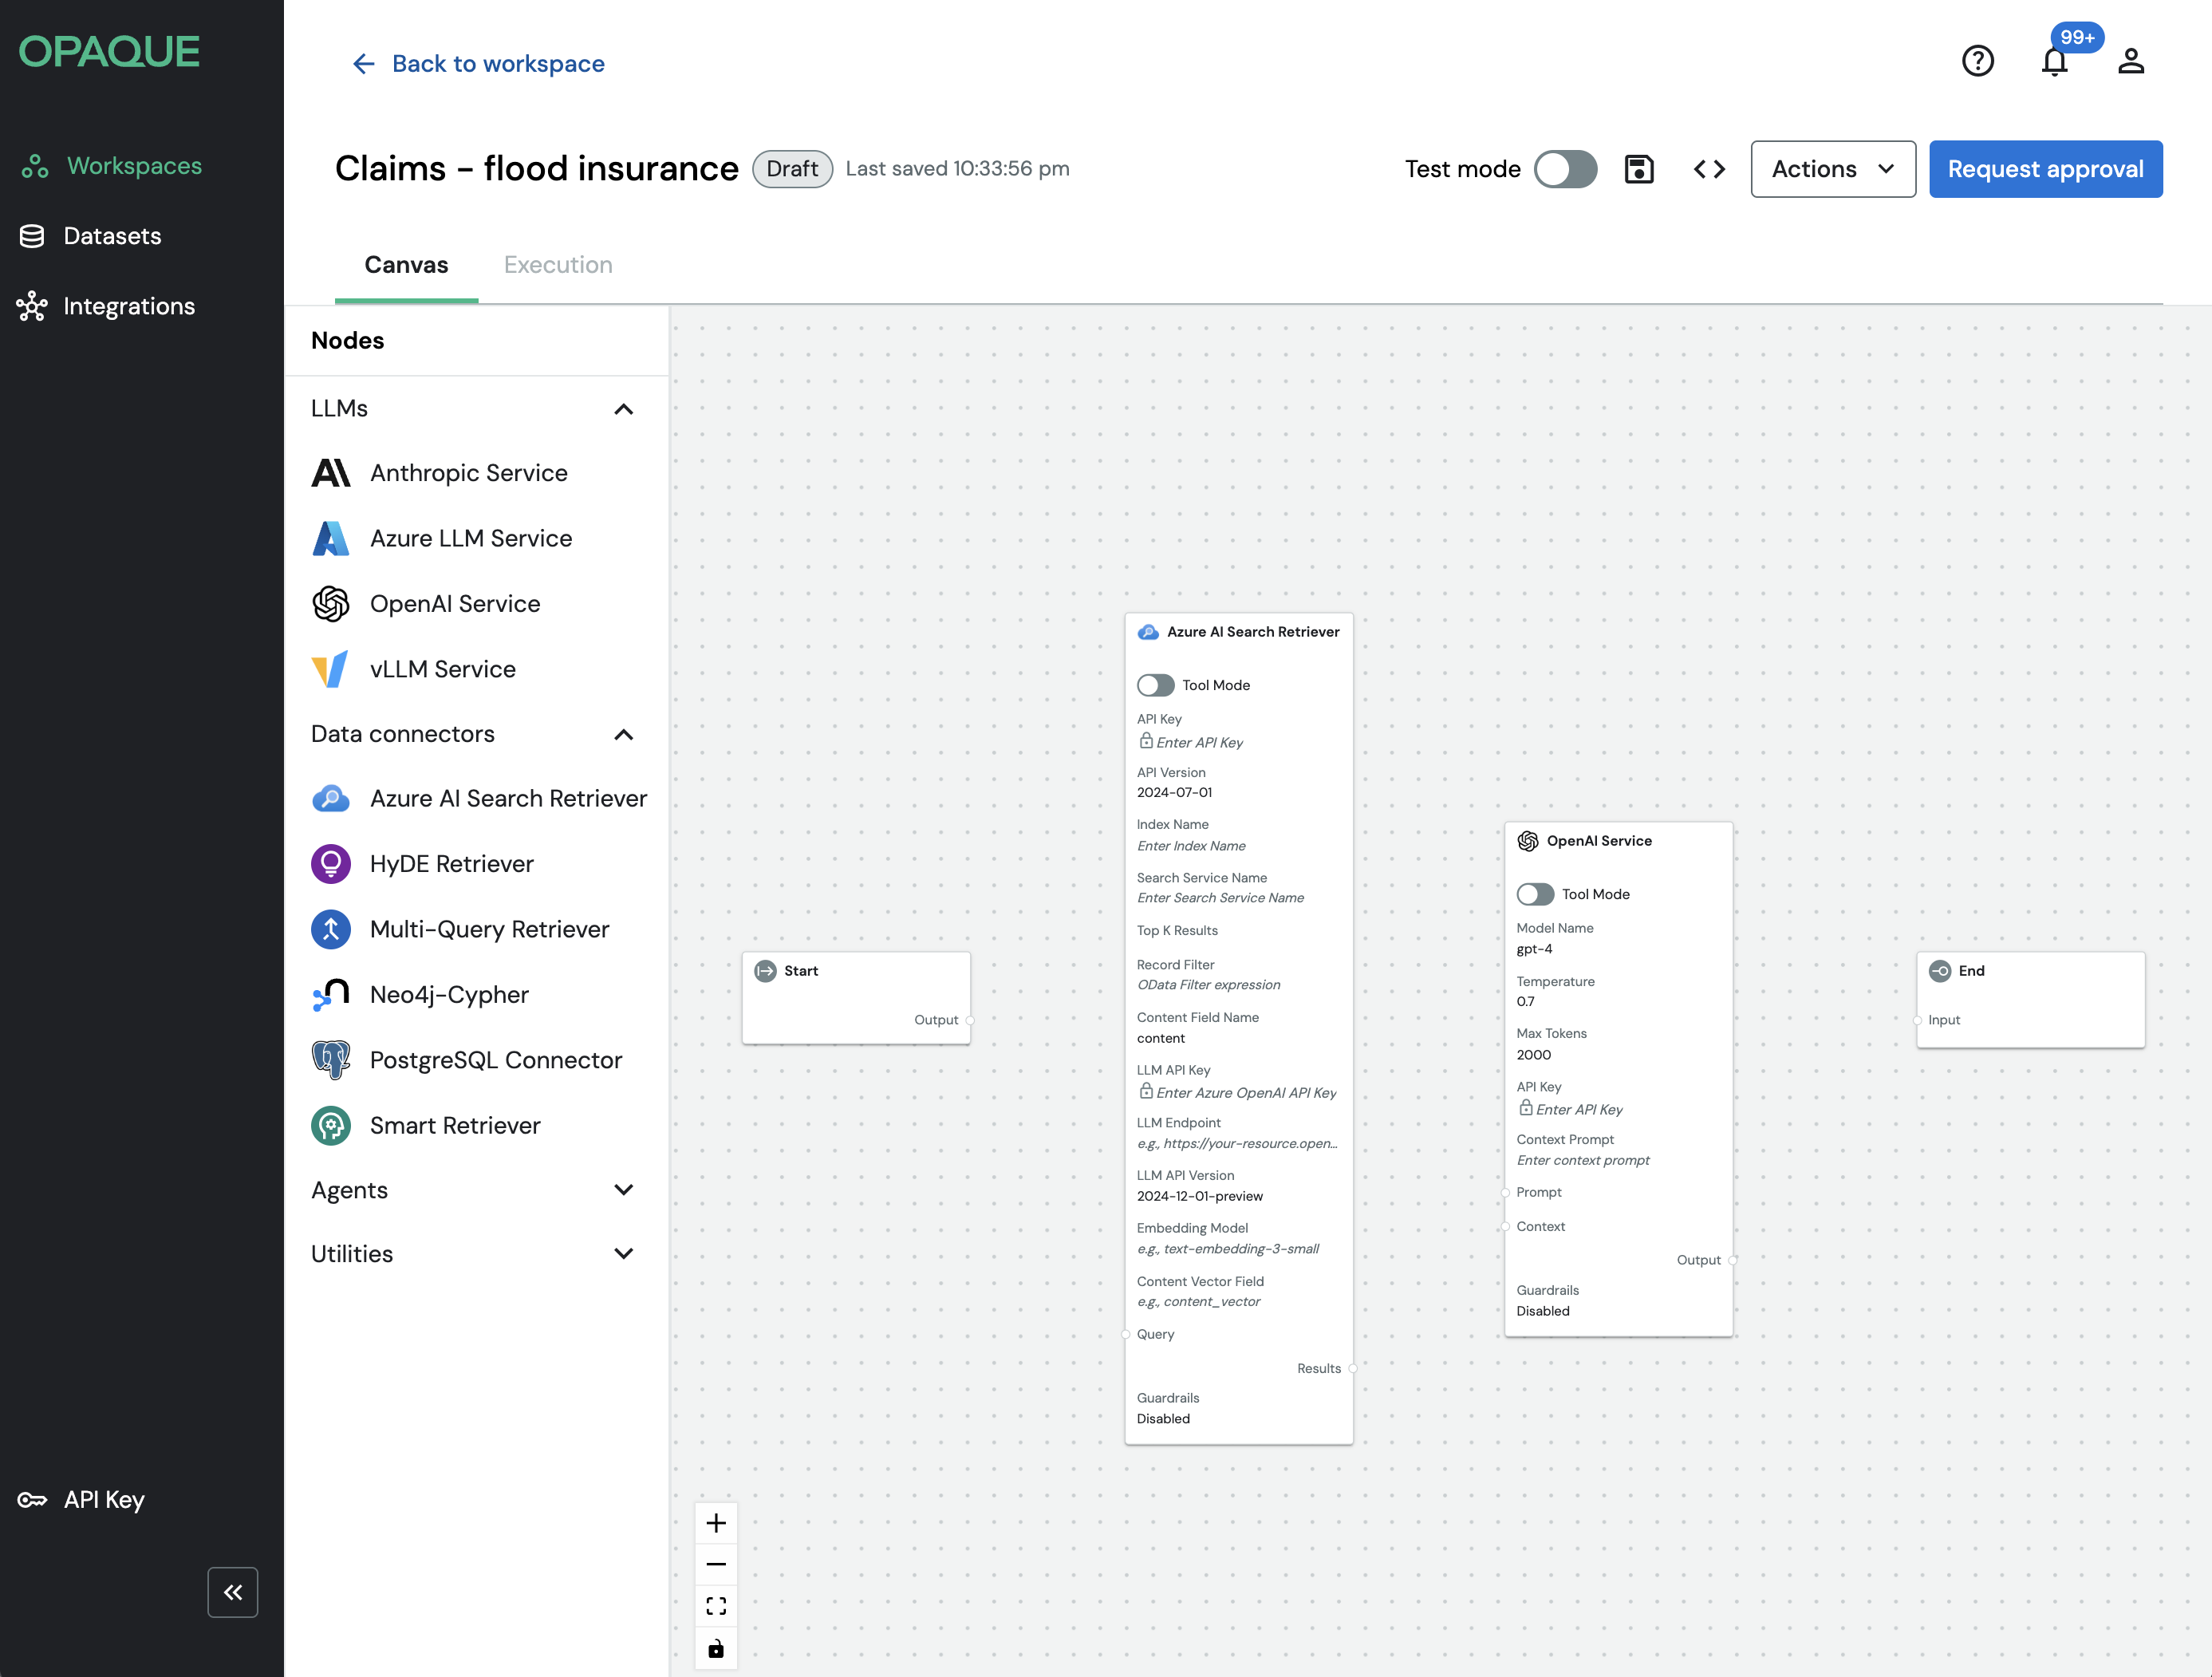
The building blocks of a simple retrieval-augmented flow.
Tool mode
Some nodes can be set to Tool mode, which makes them invocable by an Agent node rather than running as a fixed step in the Start → End sequence. For more details see Working with agents.
Configure nodes
Click a node to reveal its toolbar, which includes three options:
- Settings (:gear:)—define how the node behaves at runtime (credentials, model parameters, prompts, and so on).
- Guardrails ()—apply node-level safety or policy constraints.
- Delete ()—remove the node from the canvas.
After making changes in either panel, click Save changes.
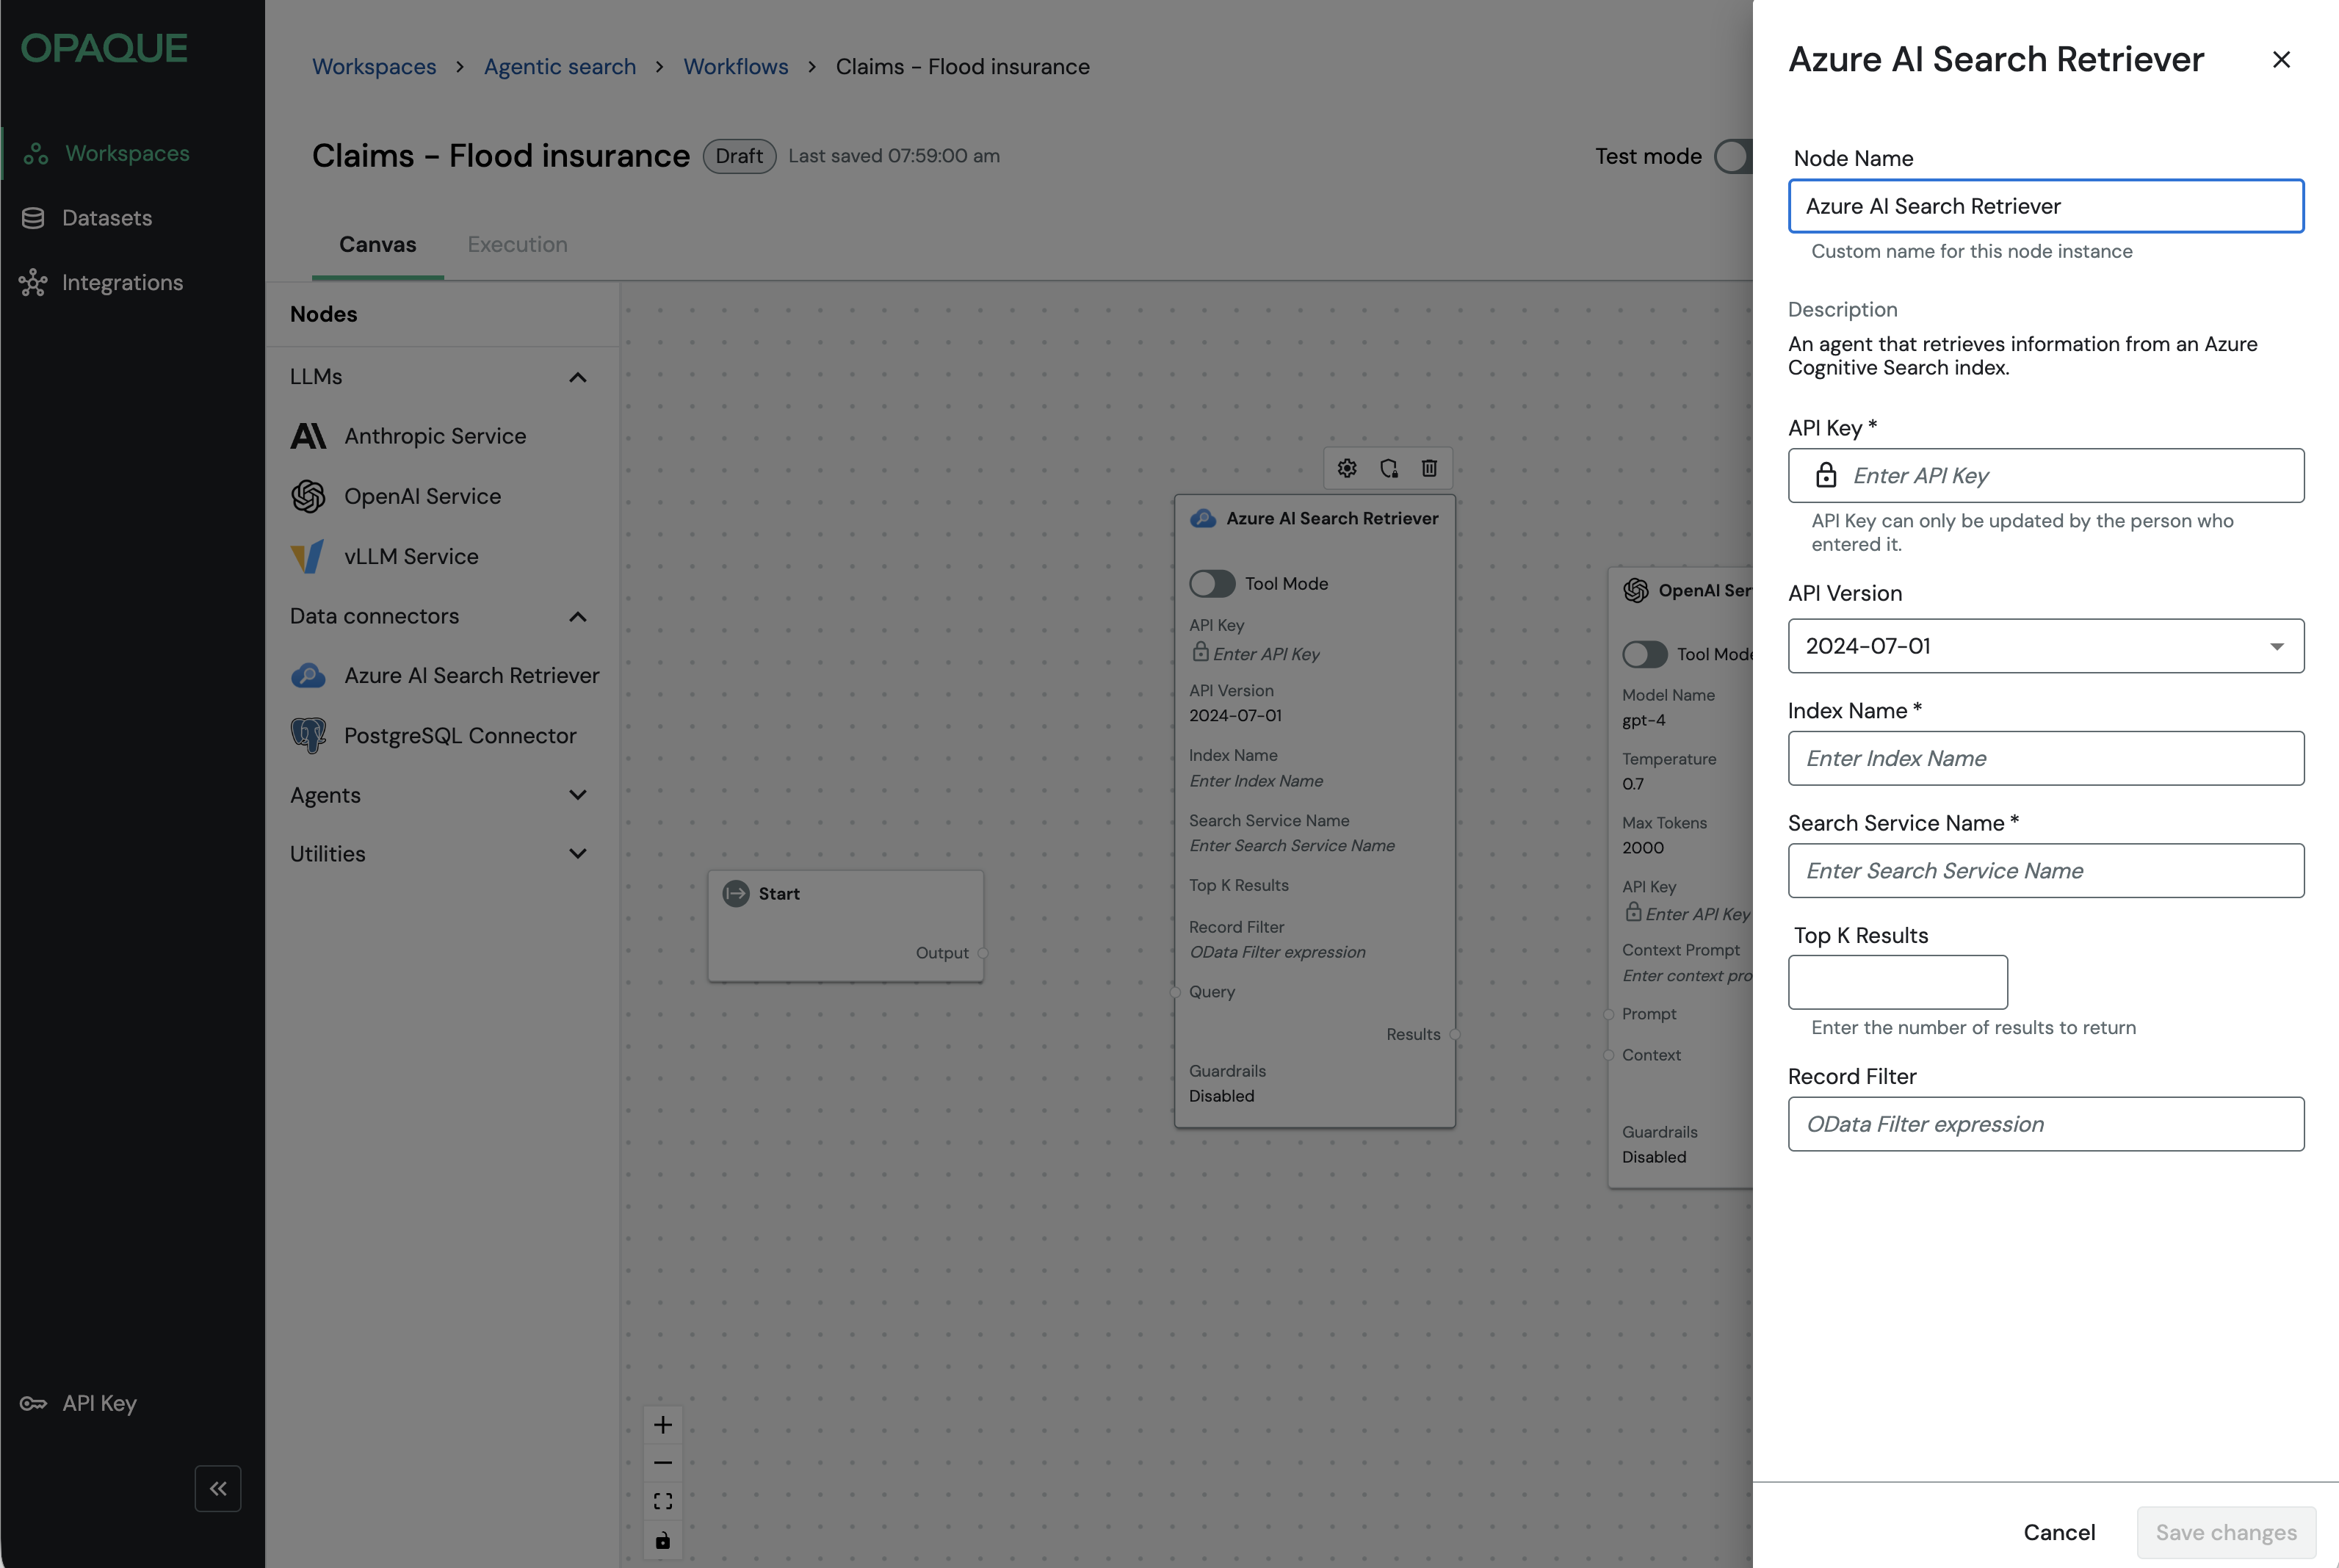
The settings panel of the Azure AI Search Retriever.
Tip
You can also save a node's configuration as a reusable integration directly from the workflow builder. When configuring a supported node, select the Save as a re-usable integration checkbox at the bottom of the configuration panel. See Using integrations for details.
Connect nodes
Once your nodes are placed and configured, connect them to define the execution path. Drag a connection from one node's output port to the next node's input port, working from Start to End.
For the simple retrieval-augmented example:
- Connect the Output port of the Start node to the Query port of the retriever node.
- Connect the Results port of the retriever node to the Prompt port of the model node.
- Connect the Output port of the model node to the End node.
Input enters through Start, flows through retrieval and model processing, and is returned through End.
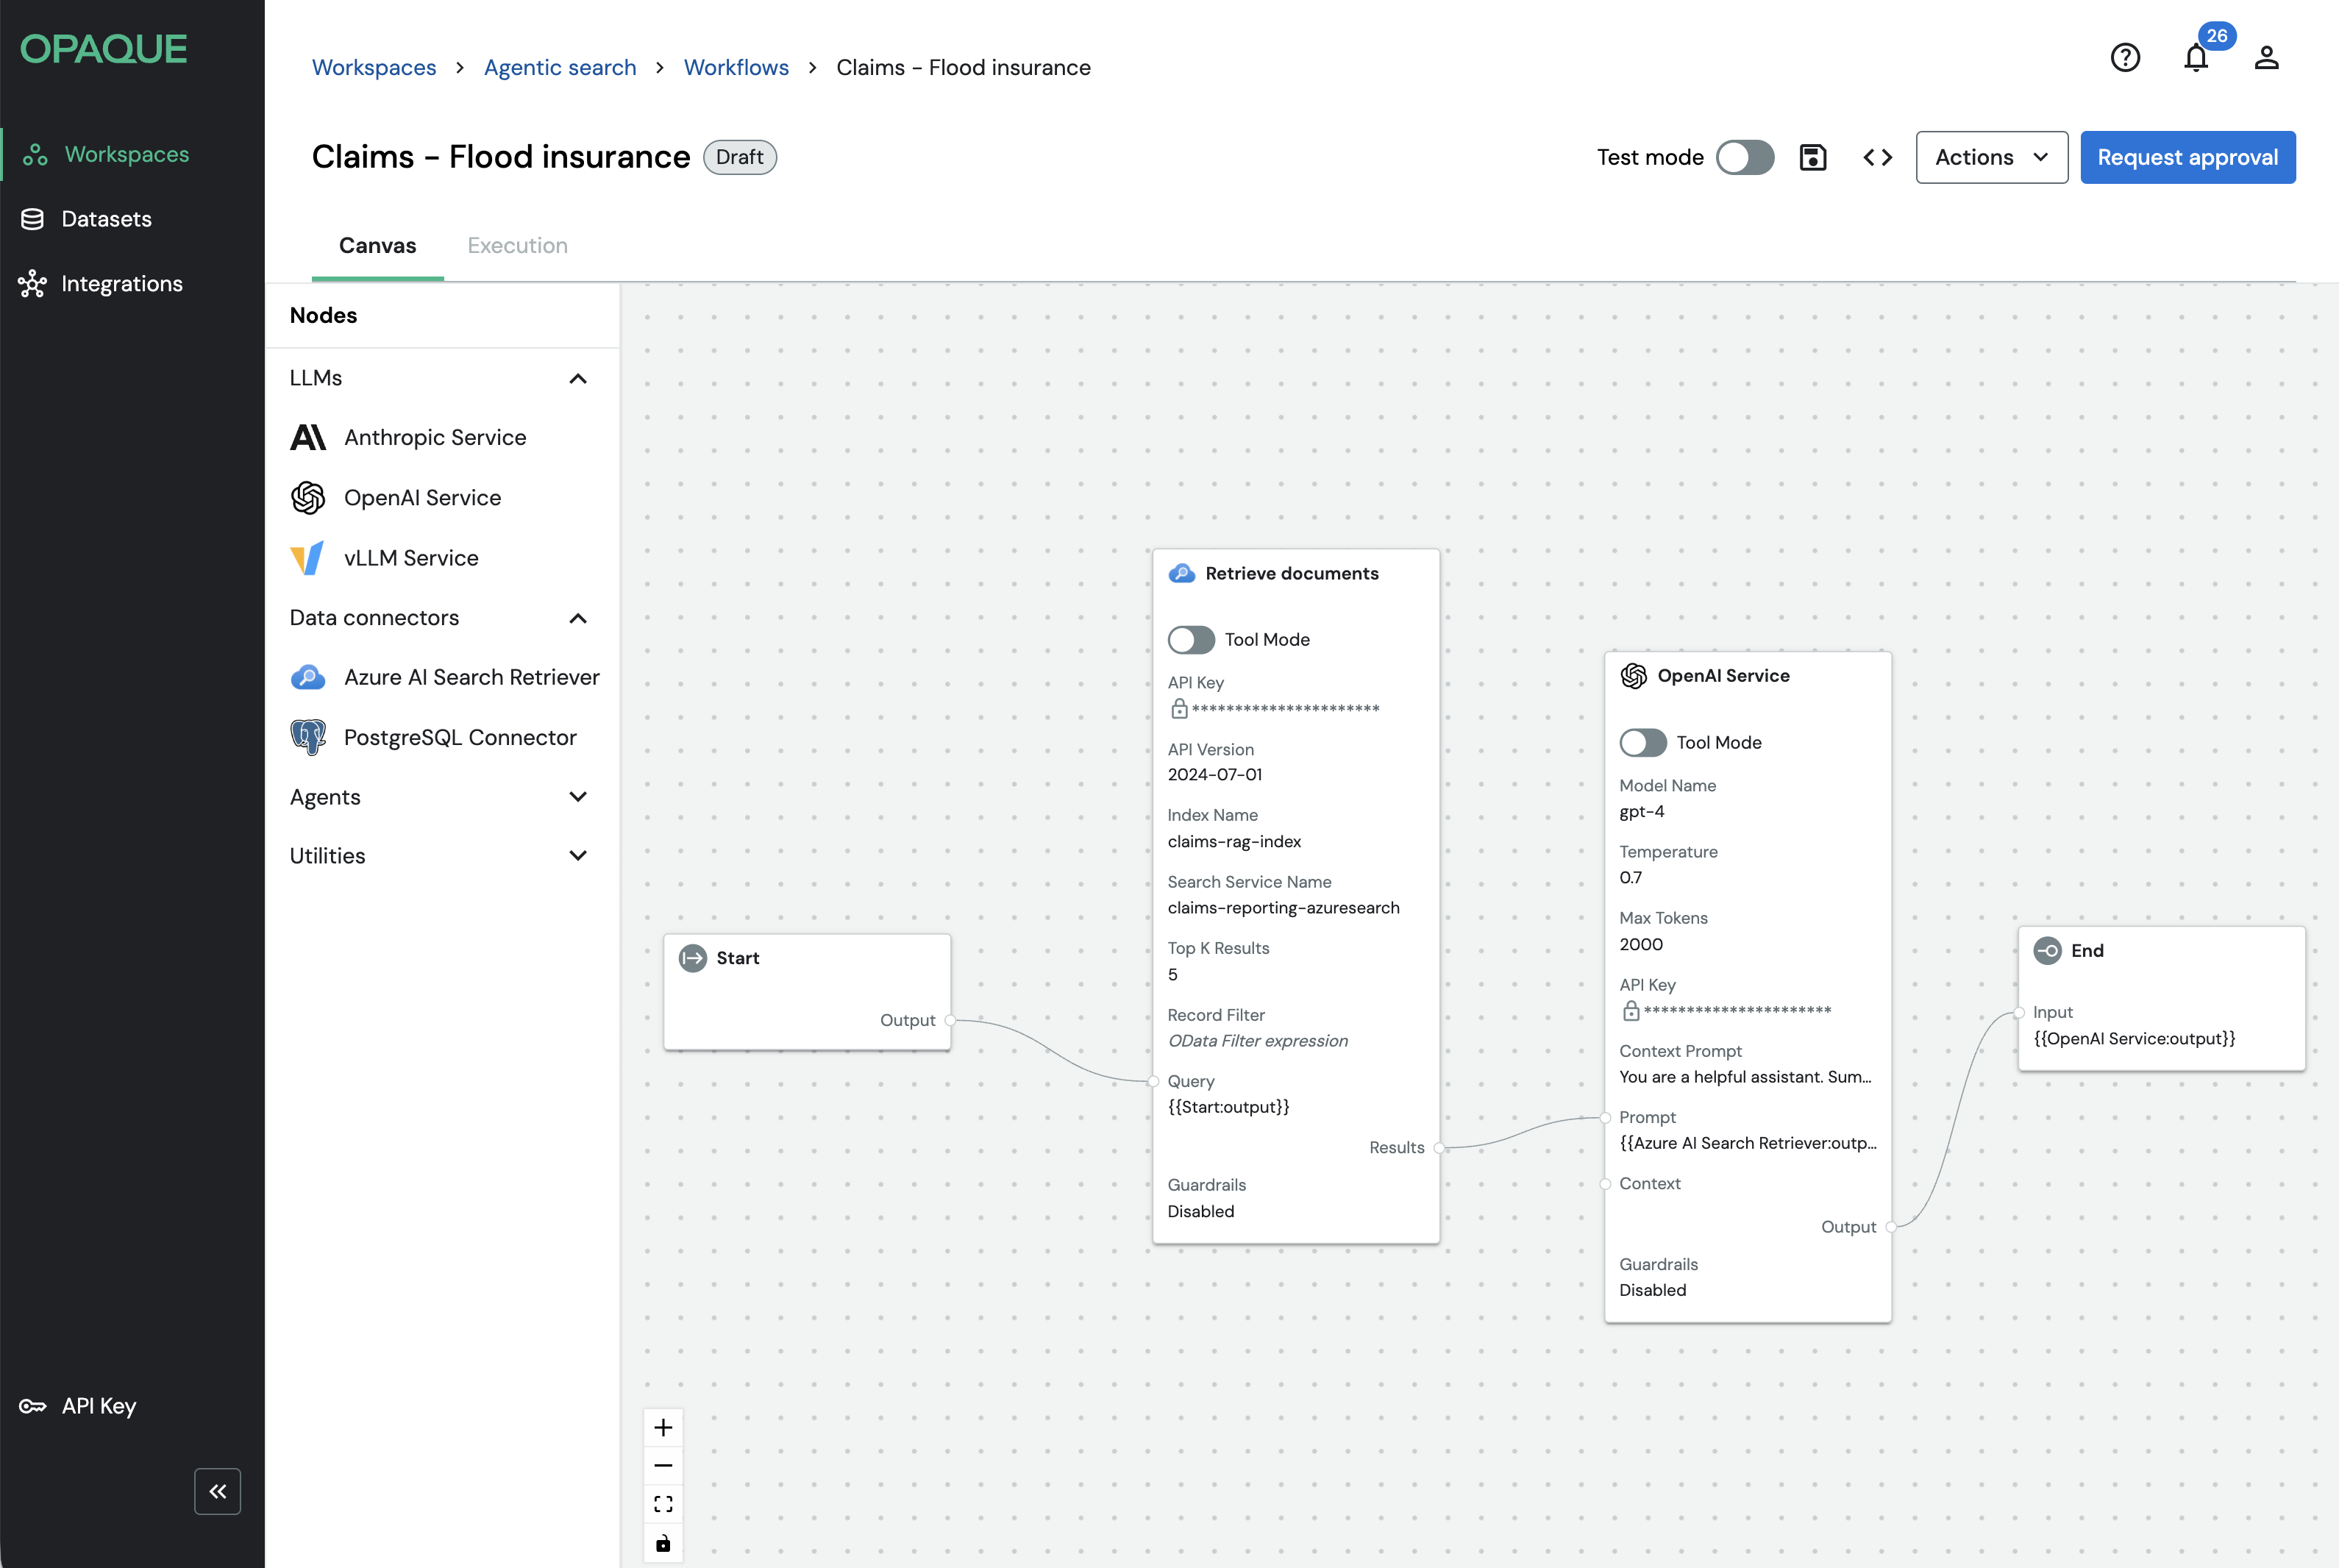
The connected nodes in the workflow builder.
Testing your workflow
Before submitting for review, you can enable Test mode to inspect node-level inputs, outputs, and agent behavior. Enable it while still in draft—you won't be able to after requesting approval. See Using test mode for a full walkthrough.
Step 2: Submit for review
When your workflow is ready, check that all nodes are configured and connected correctly, then click Request approval in the top-right corner of the canvas.
In multiparty workspaces, workflows must be reviewed and approved according to the approval policy defined in the workspace settings before they can be launched. When working in a single-party workspace, your workflow will be approved automatically when you request approval.
Request approval
When your workflow is ready:
- Check that all nodes are configured and connected correctly.
-
Click Request approval in the top right corner of the canvas. This submits the workflow for review.
- The status of your workflow changes from Draft to Under Review. You’ll see this next to the workflow name, in a status pill at the top of the page, and in the Workflows list under the workflow name and description.
- Workspace members can begin reviewing and approving the workflow.
- Use the Review Status link to track who has approved or rejected.
- If you're the only member of a workspace, your workflow will be approved automatically.
Known limitation
Reviewers aren't notified automatically when a workflow is submitted. Let them know directly.
Revise and resubmit (if rejected)
If your workflow is rejected:
- Click Review Status icon, locate the Declined row, and read the reviewer’s comment.
- Open Actions and select Return to draft.
- Make your changes and click Request approval again.
Once approved, the Request approval button is replaced by Launch workflow.
Approve or reject the workflow
To review a workflow:
- Go to the Workflows tab in your workspace and open the workflow.
- Review the full workflow on the canvas. Open each node’s settings panel (
 ) and guardrails () to confirm the configuration and constraints are correct.
 - When you're ready, click Accept workflow or Reject workflow in the reviewer toolbar.
- In the dialog box, you can optionally add a comment before confirming your selection. (While comments are optional, we recommend including one when rejecting a workflow. This helps the workflow creator understand what needs to be changed before resubmitting.)
Step 3: Launch your workflow
When your workflow is ready, click Launch workflow to bring it online. At this point, the status changes from Ready to launch to Starting to Running.
Launching activates the workflow as a persistent, callable service endpoint. Its definition is now locked.
Running in Test mode
When a workflow is launched in Test mode, the Execution tab includes additional inspection tools, such as per-node inputs, outputs, and trace logs. See Using test mode for a full walkthrough of Test mode and trace inspection.
Test with the built-in execution interface
Launching a workflow also enables the built-in execution interface, which provides a quick way to trigger and verify the workflow manually:
- Switch to the Execution tab.
- Enter a value (for example, a query for a retriever-based workflow).
- Click Run workflow to view the response.
This is useful for validating behavior before connecting the workflow to an application.
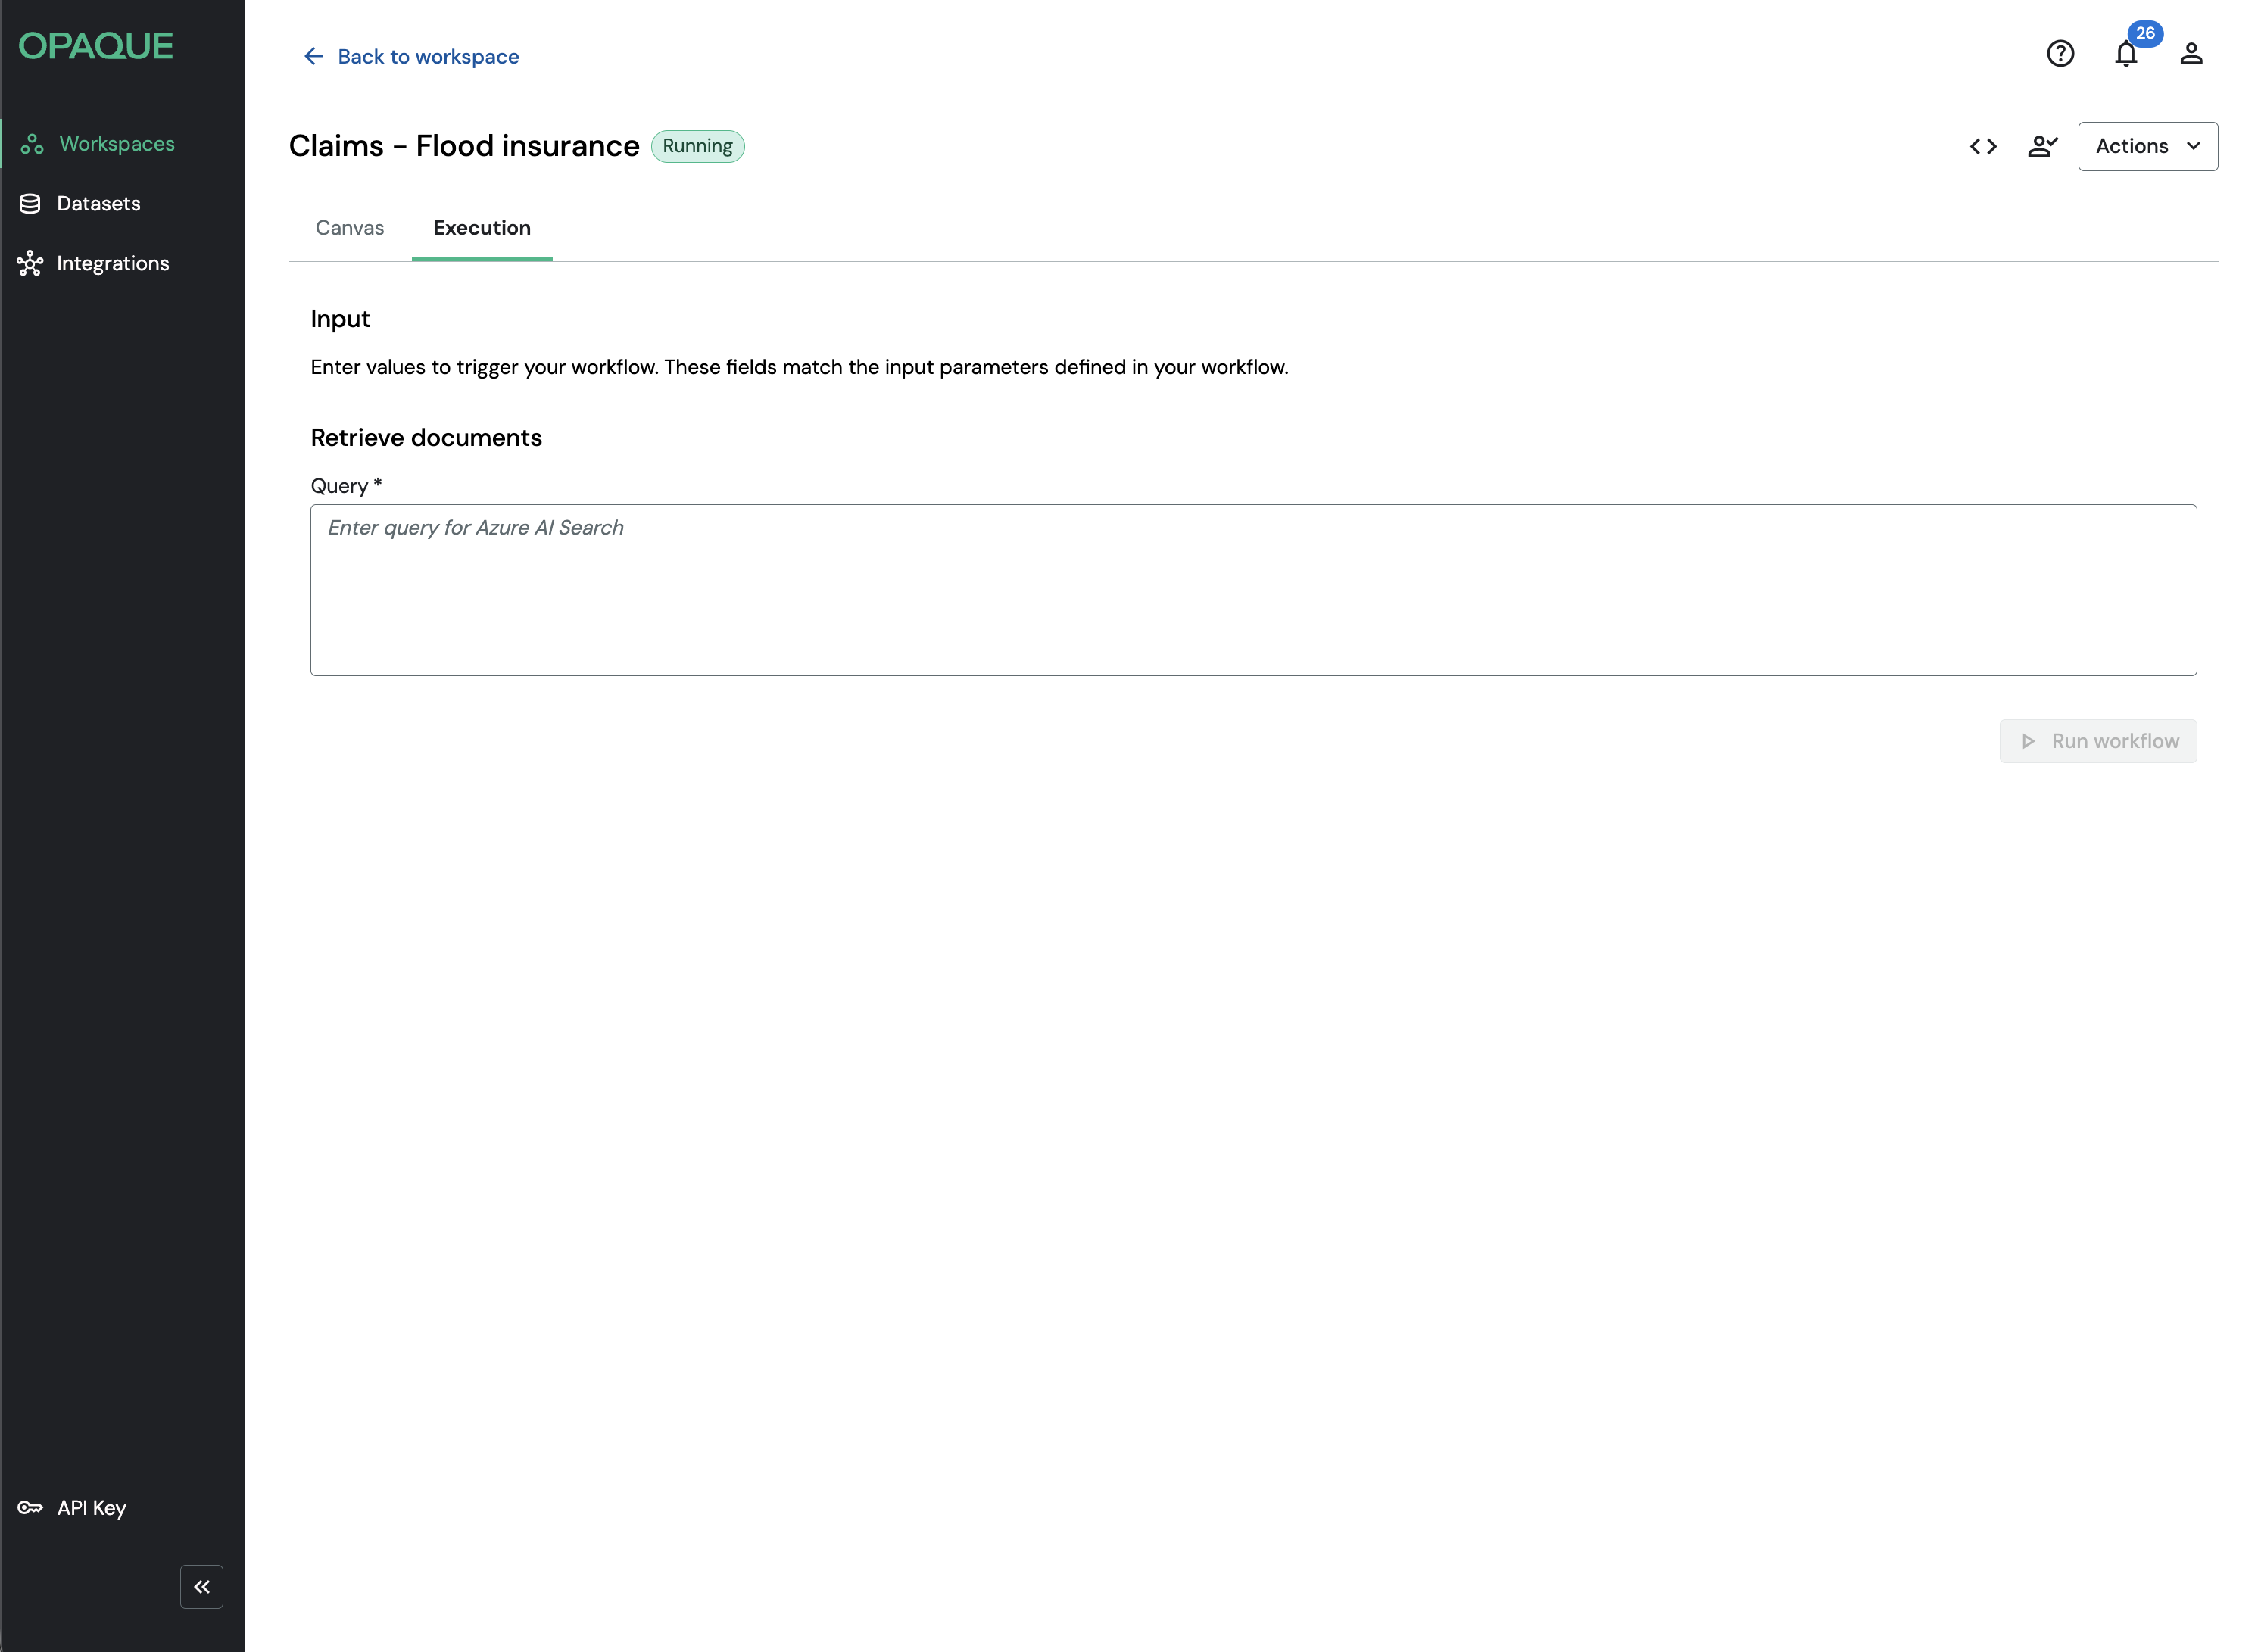
Use the built-in chat UI for a quick way to trigger and verify your workflow.
Stateless execution
Each execution is independent—the workflow doesn’t retain conversation history between runs. If your workflow needs context from earlier steps, include it explicitly in each input.
Stop or modify a running workflow
To modify a running workflow, you need to stop and return it to draft first:
- To stop the workflow, select Actions → Stop workflow.
- To make changes, select Actions → Return to draft.
After making changes, you must resubmit the workflow for approval before you can launch it again (see step 2).
The built-in execution UI is ideal for testing and validation. To integrate workflows into applications, automate executions, or request attestation reports, you’ll use the OPAQUE SDK.
Step 4: Invoke your workflow via the SDK
After a workflow is launched, you can invoke it programmatically from any application using the OPAQUE Python SDK—for example, a web app that submits user queries, an internal service that triggers workflows on a schedule, or a notebook that submits structured inputs to a deployed agentic workflow.
For details on how to invoke workflows programmatically, see Invoking workflows.
What's next
You now know how to build, review, launch, and invoke a workflow. From here, you can:
- Add more node types: Explore retrieval strategies, agent nodes, and data connectors. See Working with nodes and Configuring nodes.
- Work with agents: Build goal-directed reasoning steps with dynamic tool use. See Working with agents.