Managing users
Member management in Opaque begins with your organization’s identity provider (for example, Okta or Microsoft Entra), where your IT team provisions users. After signing in, users are automatically added to the Admin member list. As an organization admin, you can then assign them the workspace admin role.
Viewing users
To view the list of users in your organization, sign in to Opaque and select Admin in the left-hand nav.
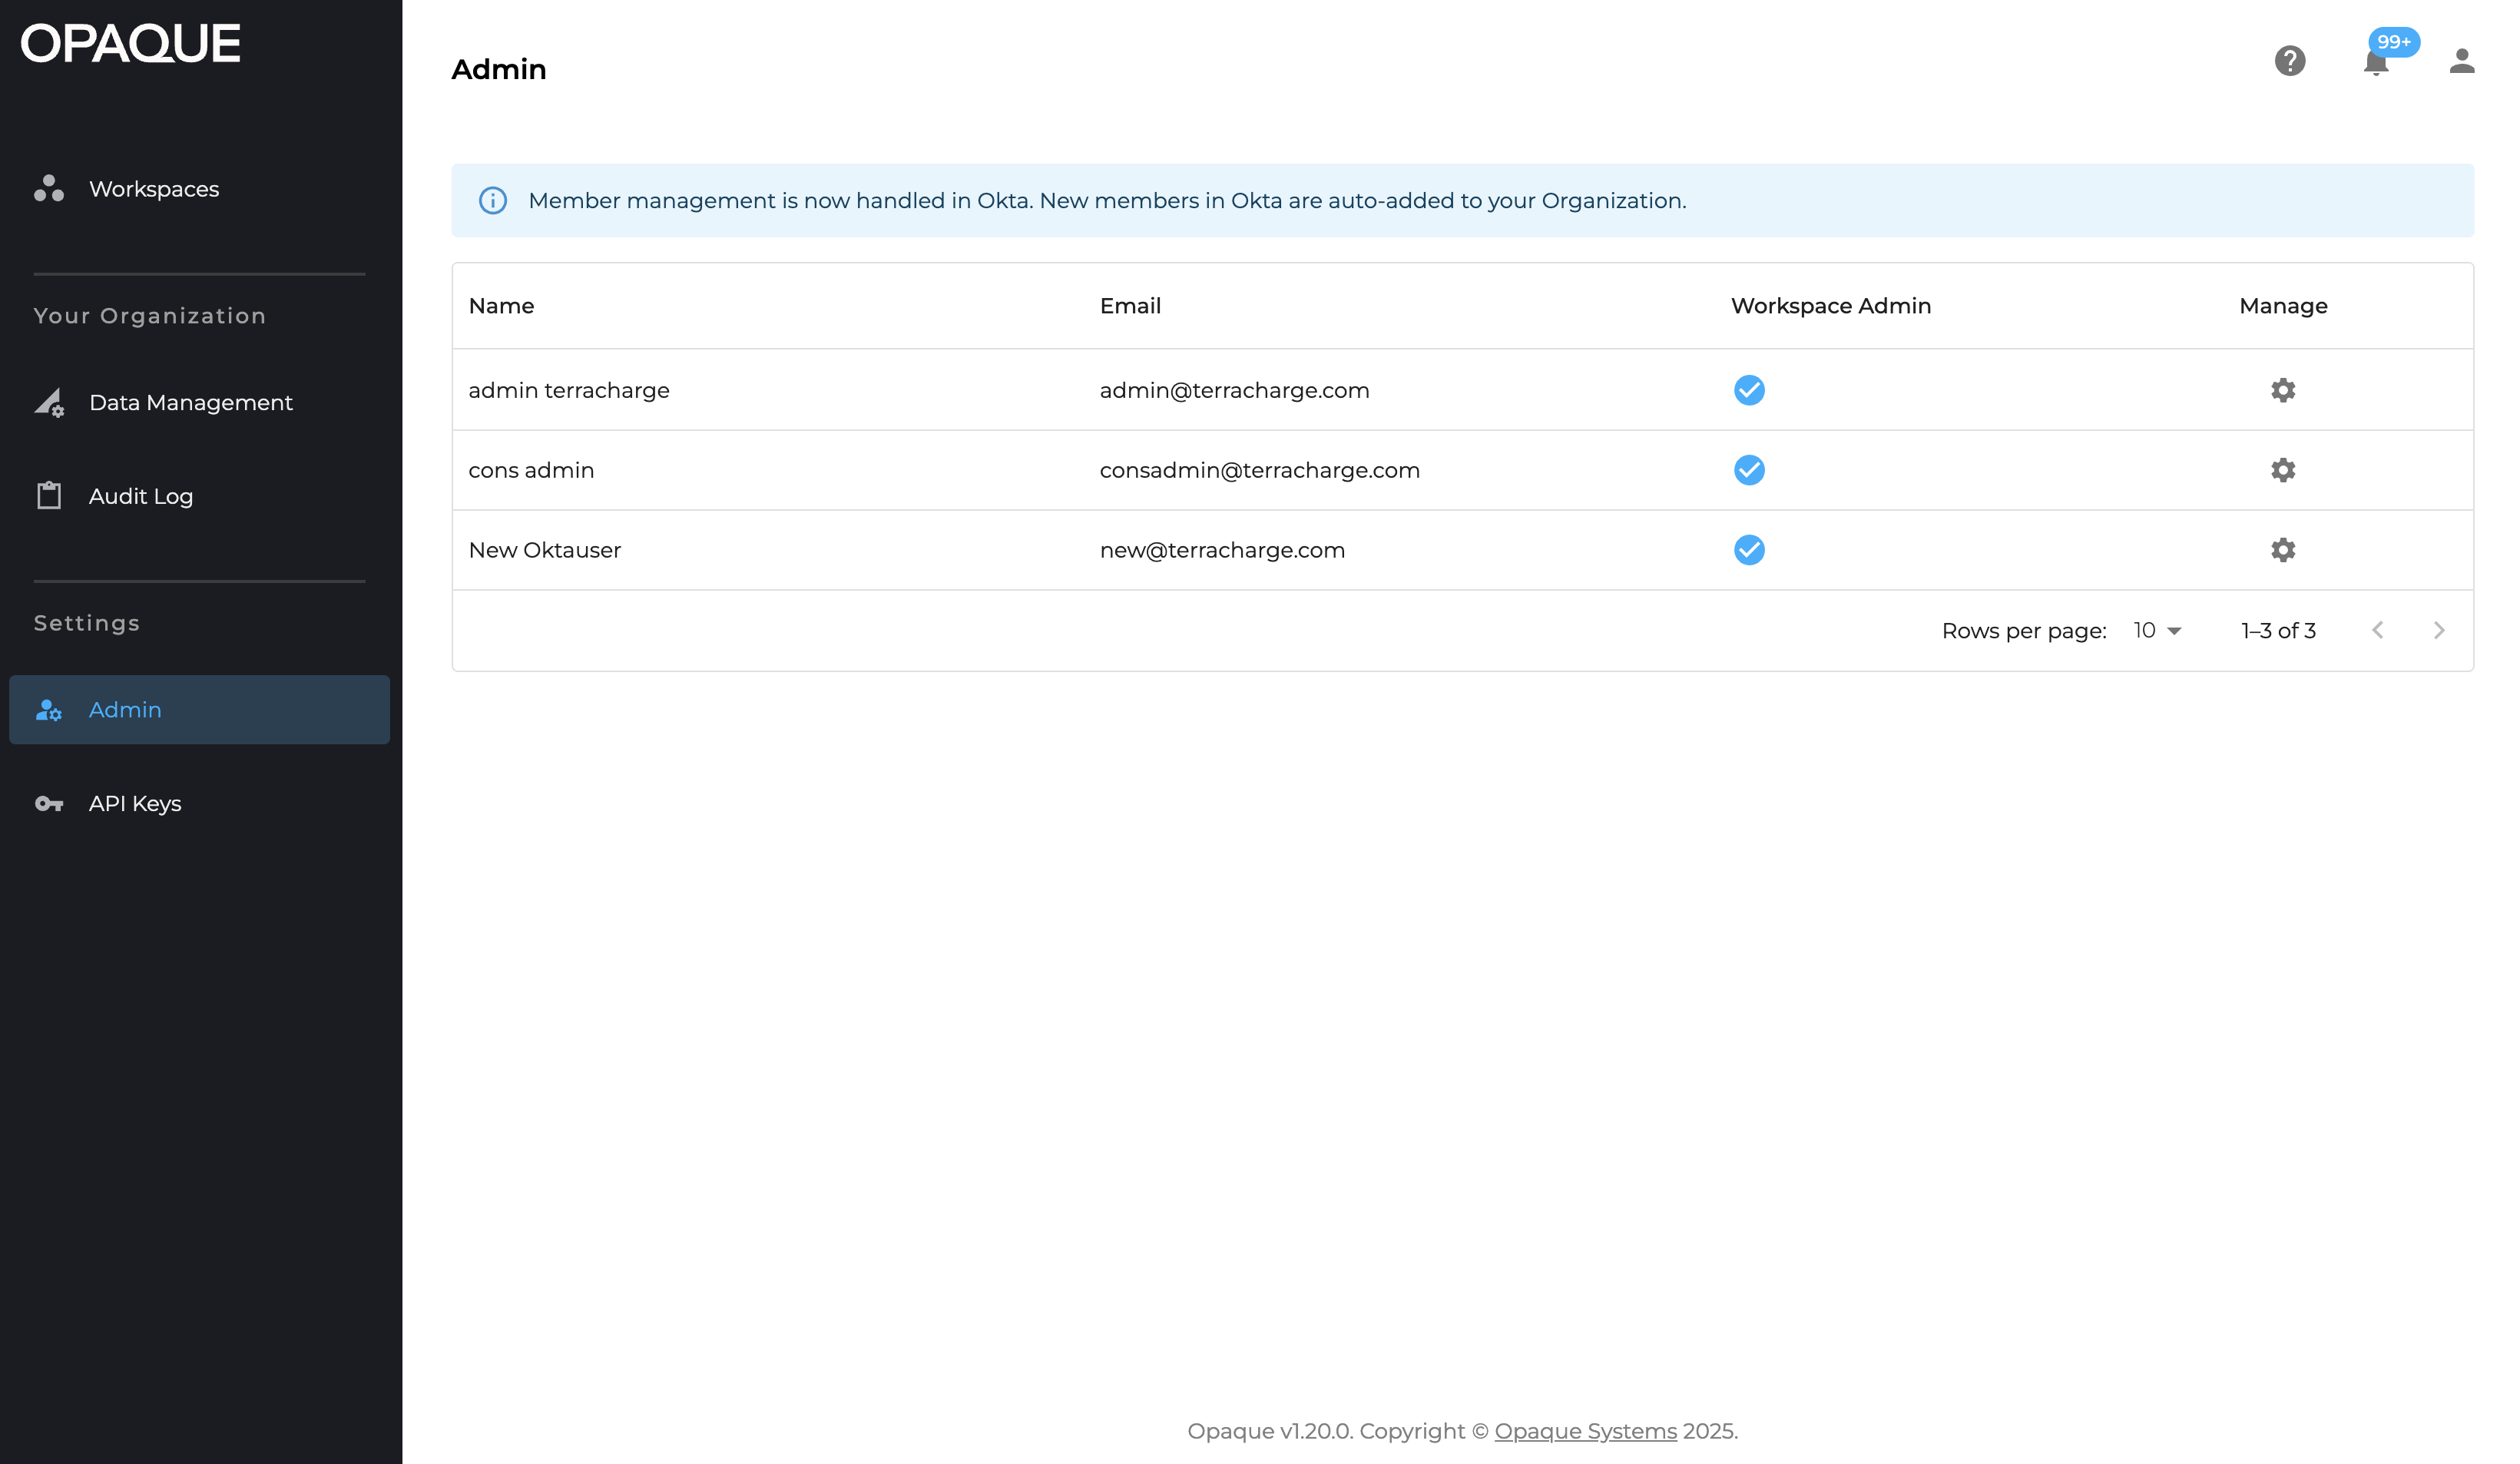
Only organization admins can see all users in their organization.
The Admin page includes the following columns:
- Name: The user’s first and last name.
- Email: The user's email address.
- Workspaces: Indicates the number of workspaces the user belongs to.
- Workspace Admin: Indicates whether the user holds the workspace admin role.
Each user row also includes a (Edit member) icon to the right of the Workspace Admin column for managing that user’s role and workspace membership.
Users are sorted by join date (oldest to newest) by default.
Editing a user’s role
To assign or remove the workspace admin role:
- On the Admin page, locate the user.
- Click the (Edit member) icon to the right of the Workspace admin column.
- In the fly-out panel, select or clear Workspace Admin.
Changes take effect immediately.
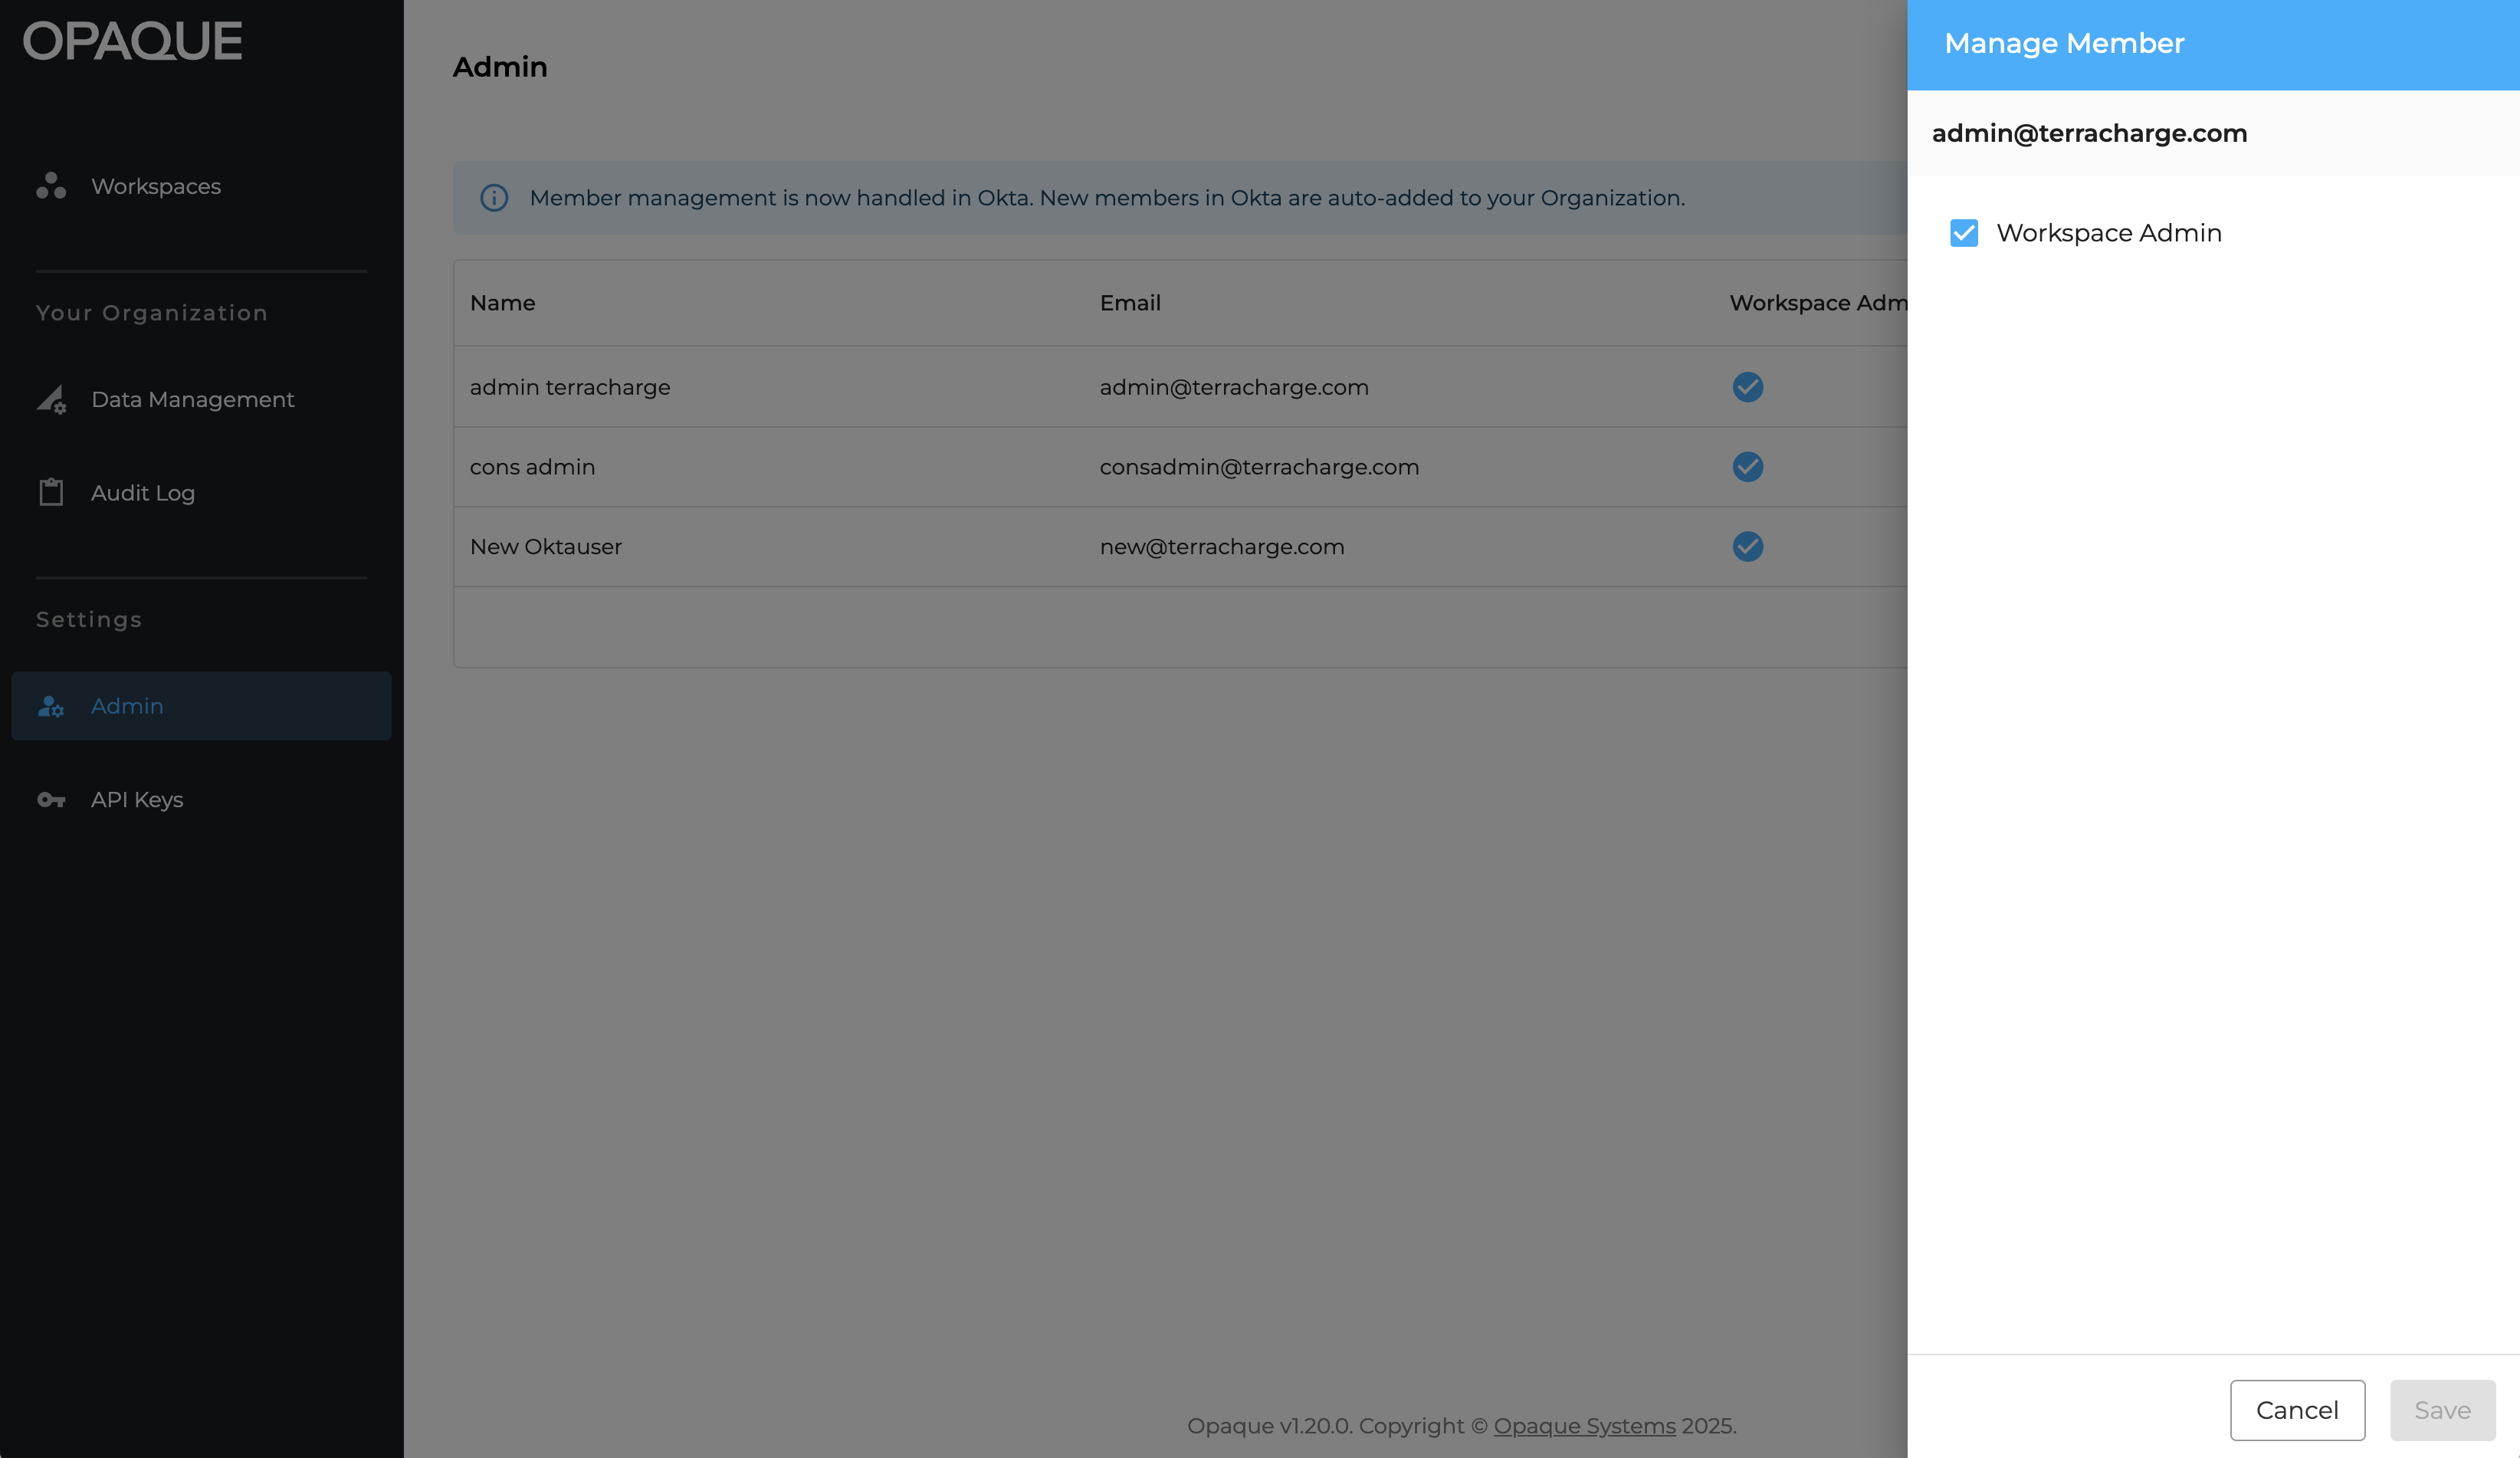
Use the member panel to manage a user’s role and workspace membership.
Managing workspace membership
In the same panel, you can also manage the user’s workspace membership.
To add the user to a workspace:
- Click Add to workspace.
- Use the search box or dropdown to find the workspace.
- Select the workspace, then click Add to workspace.
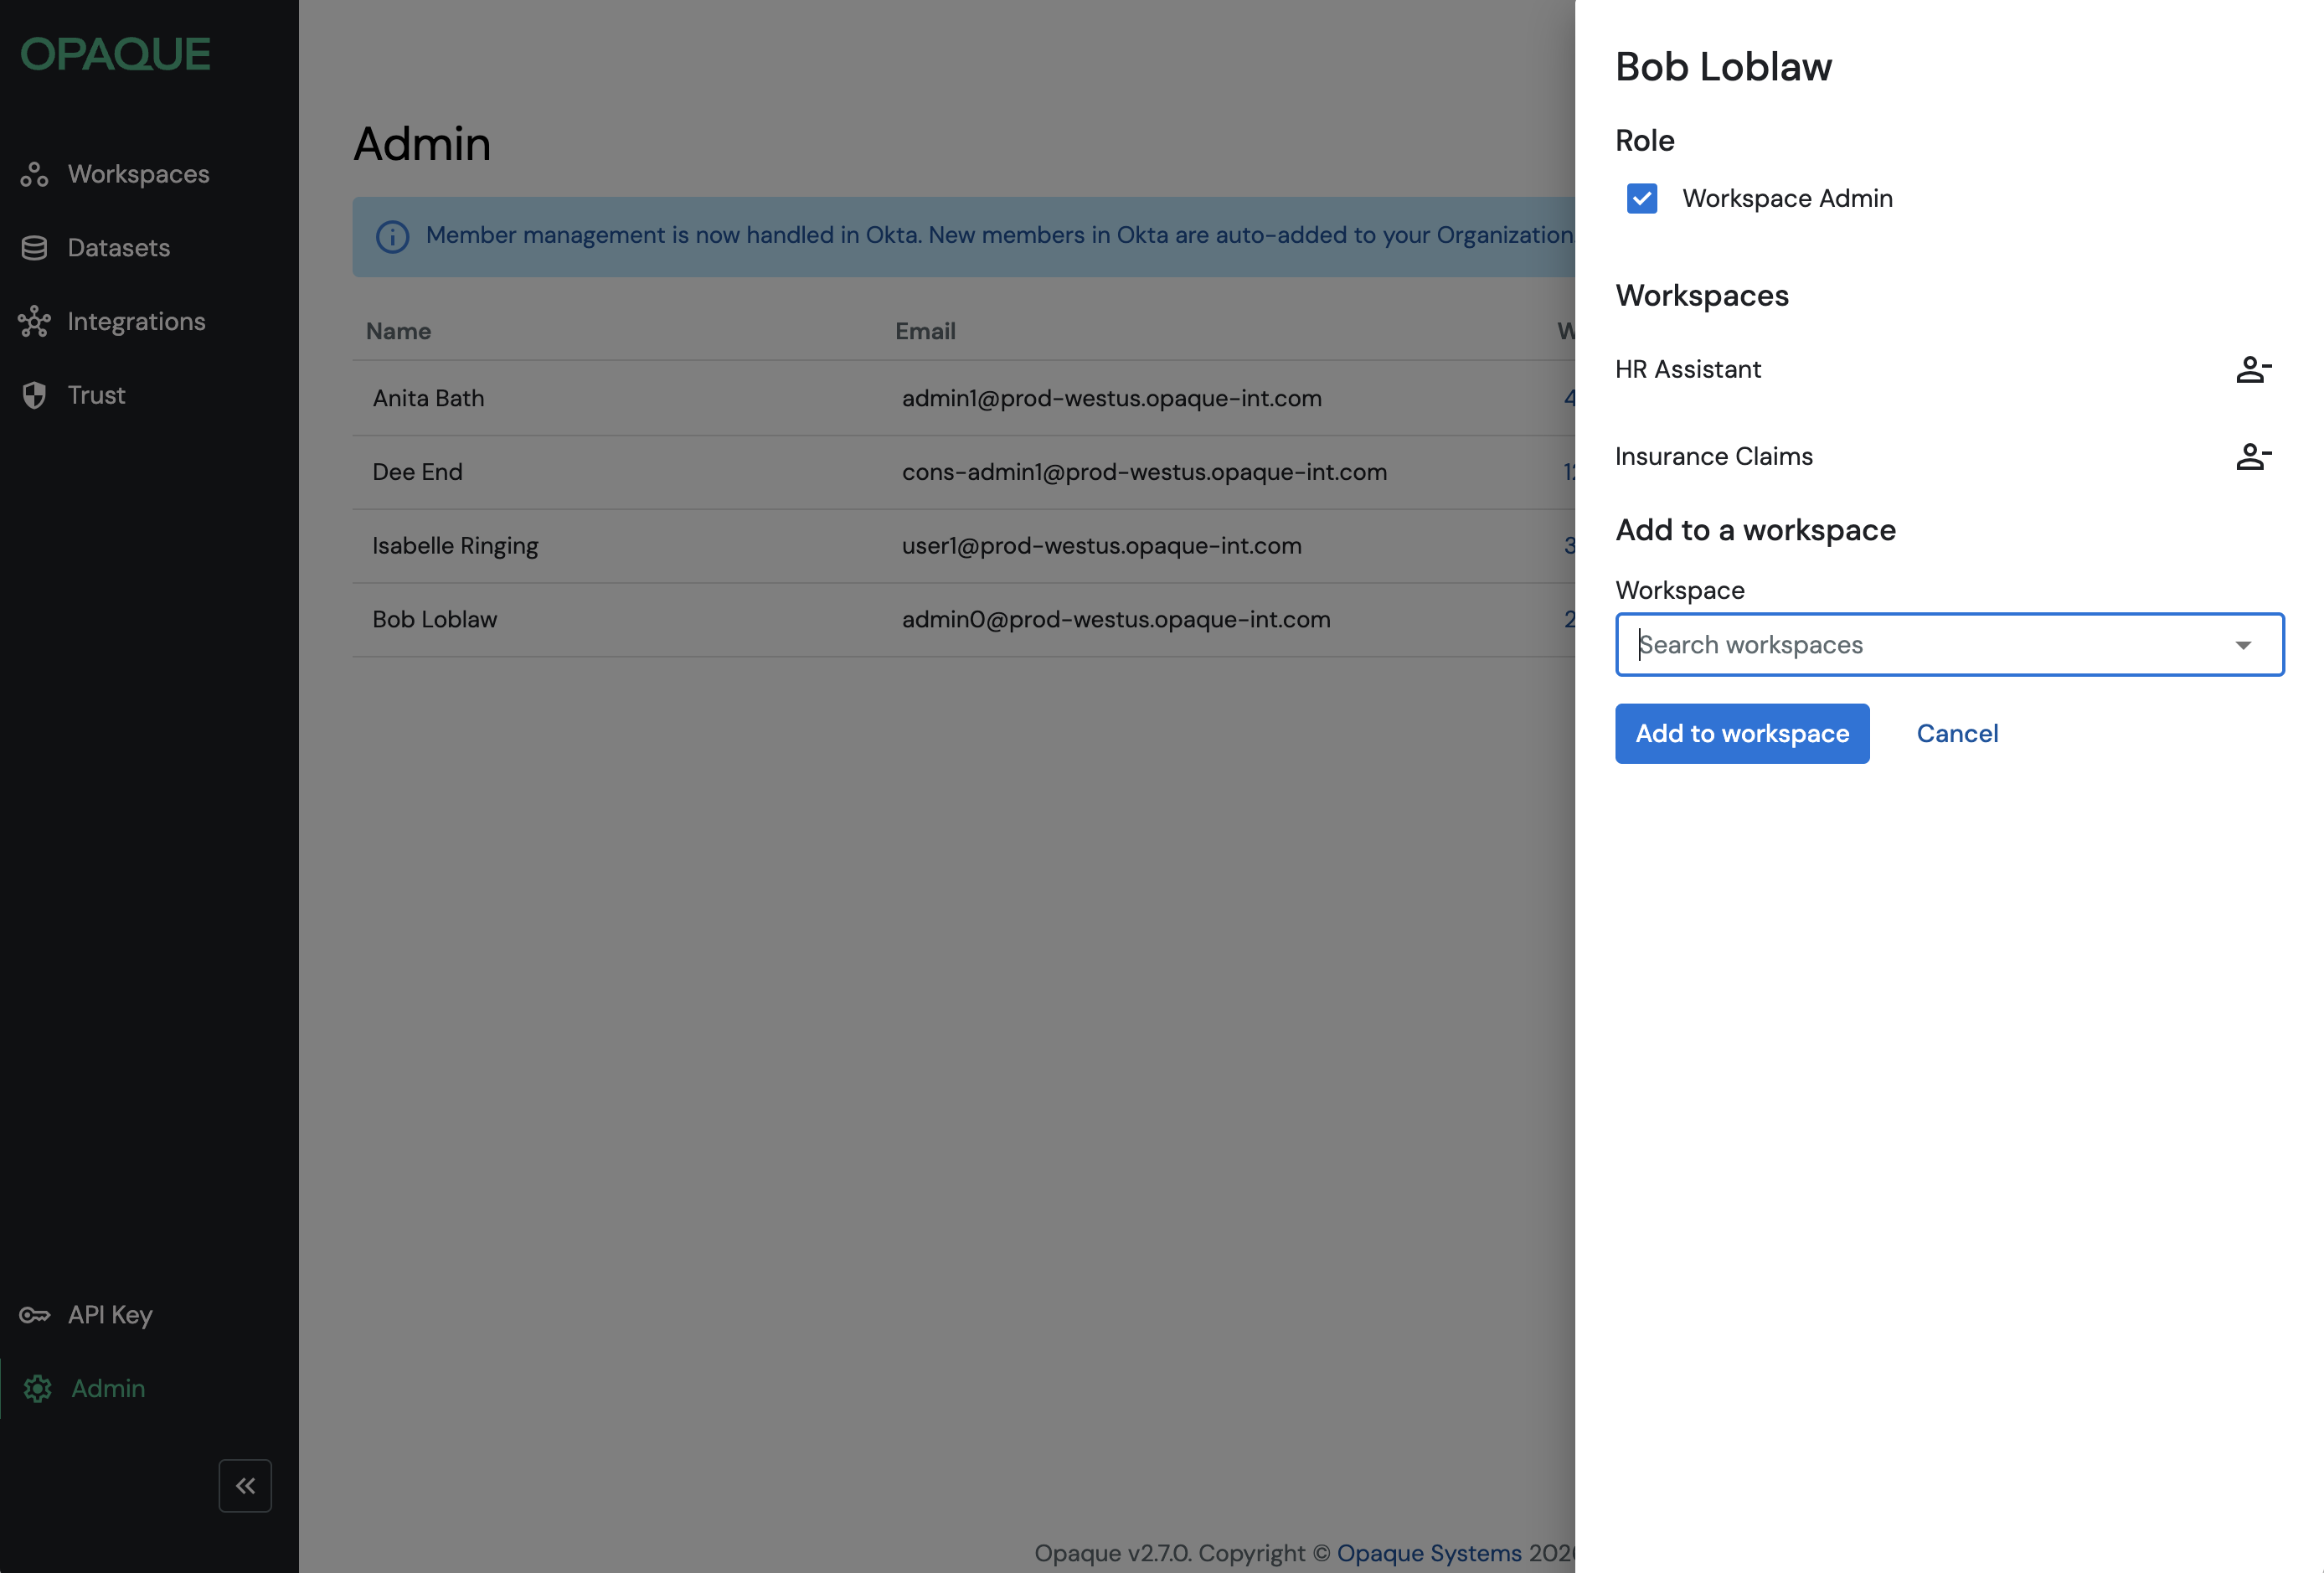
Use the member panel to select a workspace and confirm the addition.
To remove a user from a workspace:
- Click the Remove member icon next to the workspace.
- In the confirmation dialog, click Remove member.

Click Remove member icon to remove the member from the workspace.
When a user is removed from a workspace:
- Their access to the workspace is revoked immediately.
- They can no longer access or manage resources in that workspace.
- Policies are re-evaluated based on the updated membership.
Note
See also Managing workspaces for details on managing members and policies within individual workspaces.